
The MCP Clients tab (inside any server) is where you connect an app. Pick your client from the row of sub-tabs, and the page gives you everything you need: a one-click password, the exact config file to edit, and a copy-paste JSON block.
Before you start: the generated config runs through Node, so you need Node.js 22 or newer installed. Check with
node -vand upgrade if you are below 22.
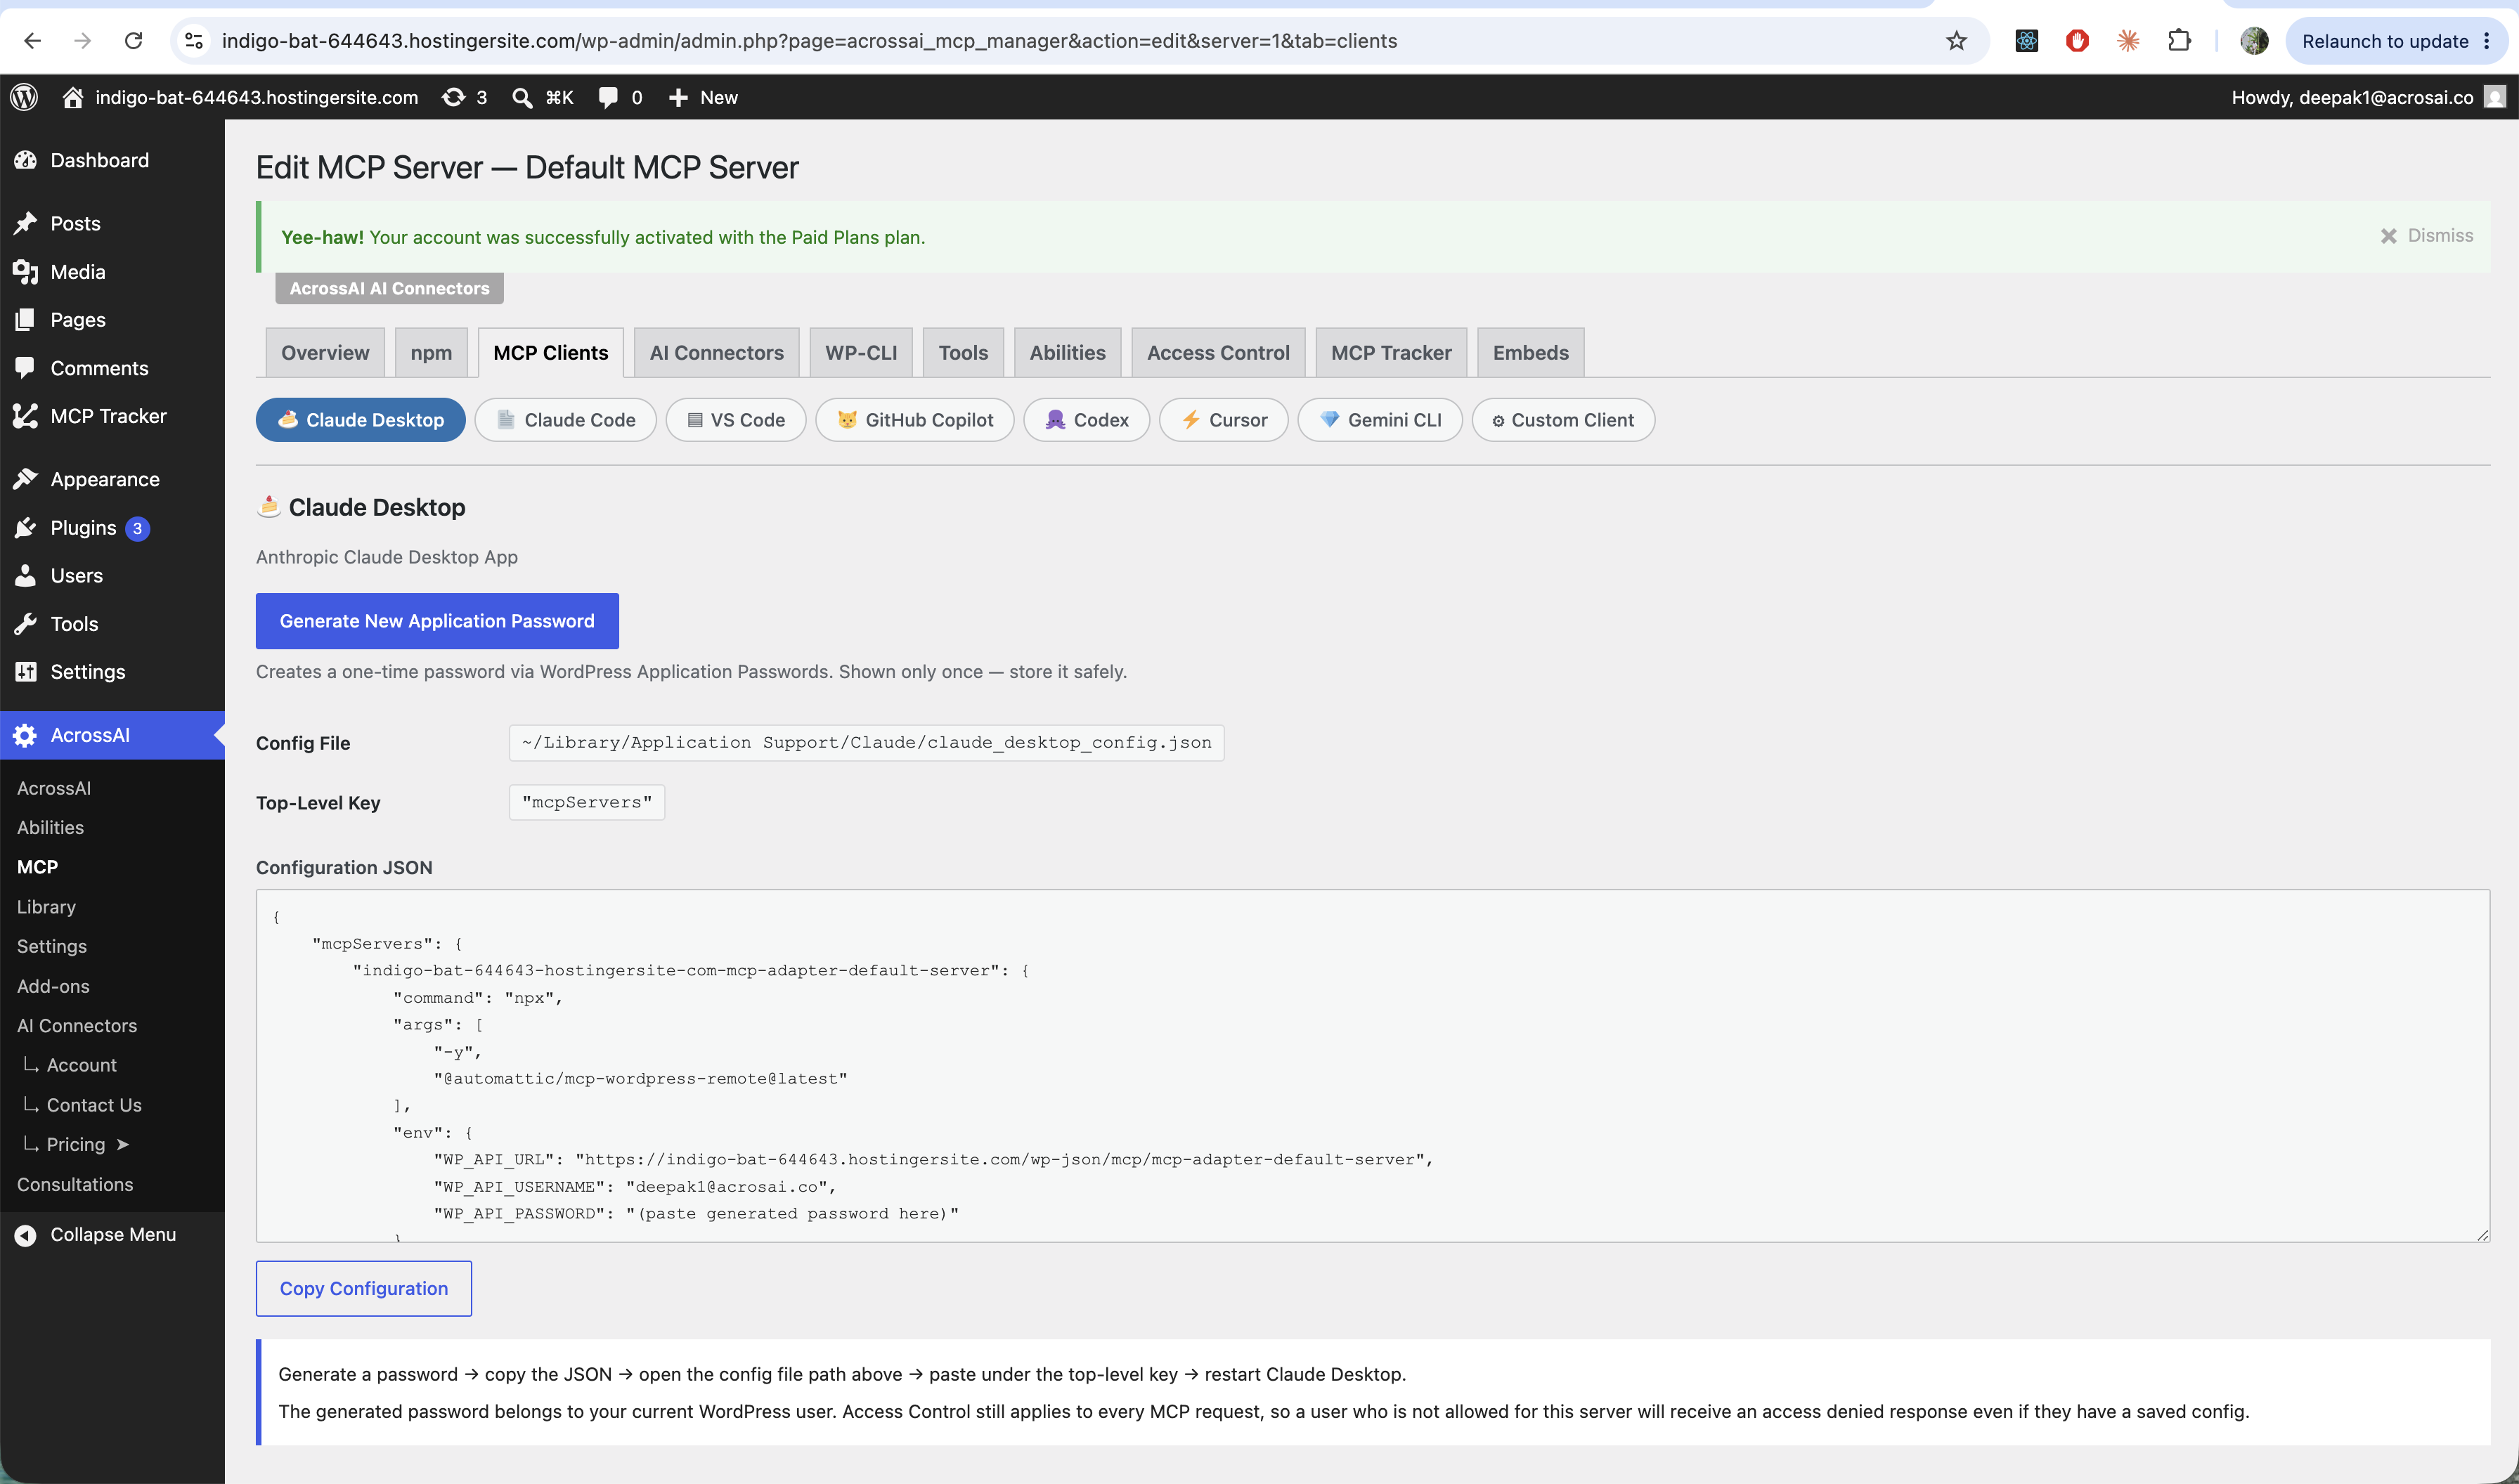
The steps (same for every client)
- Open a server and go to MCP Clients, then click your client’s sub-tab.
- Click Generate New Application Password. It appears once — copy it now.
- Note the Config File path and Top-Level Key shown on the page.
- Click Copy Configuration and paste the JSON into that file, under that key.
- Replace the password placeholder with the password you generated.
- Save the file and restart your client.
Where each client’s config lives
| Client | Config file | Top-level key | Video guide |
|---|---|---|---|
| Claude Desktop | ~/Library/Application Support/Claude/claude_desktop_config.json | mcpServers | Watch |
| Claude Code | ~/.claude.json | mcpServers | Coming soon |
| VS Code | ~/.vscode/mcp.json | servers | Watch |
| GitHub Copilot | ~/.vscode/mcp.json | servers (under mcp) | Coming soon |
| Codex | ~/.codex/config.toml | mcp_servers | Coming soon |
| Cursor | ~/.cursor/mcp.json | mcpServers | Coming soon |
| Gemini CLI | ~/.gemini/settings.json | mcpServers | Coming soon |
| Custom Client | Your client’s config | Standard MCP format | Coming soon |
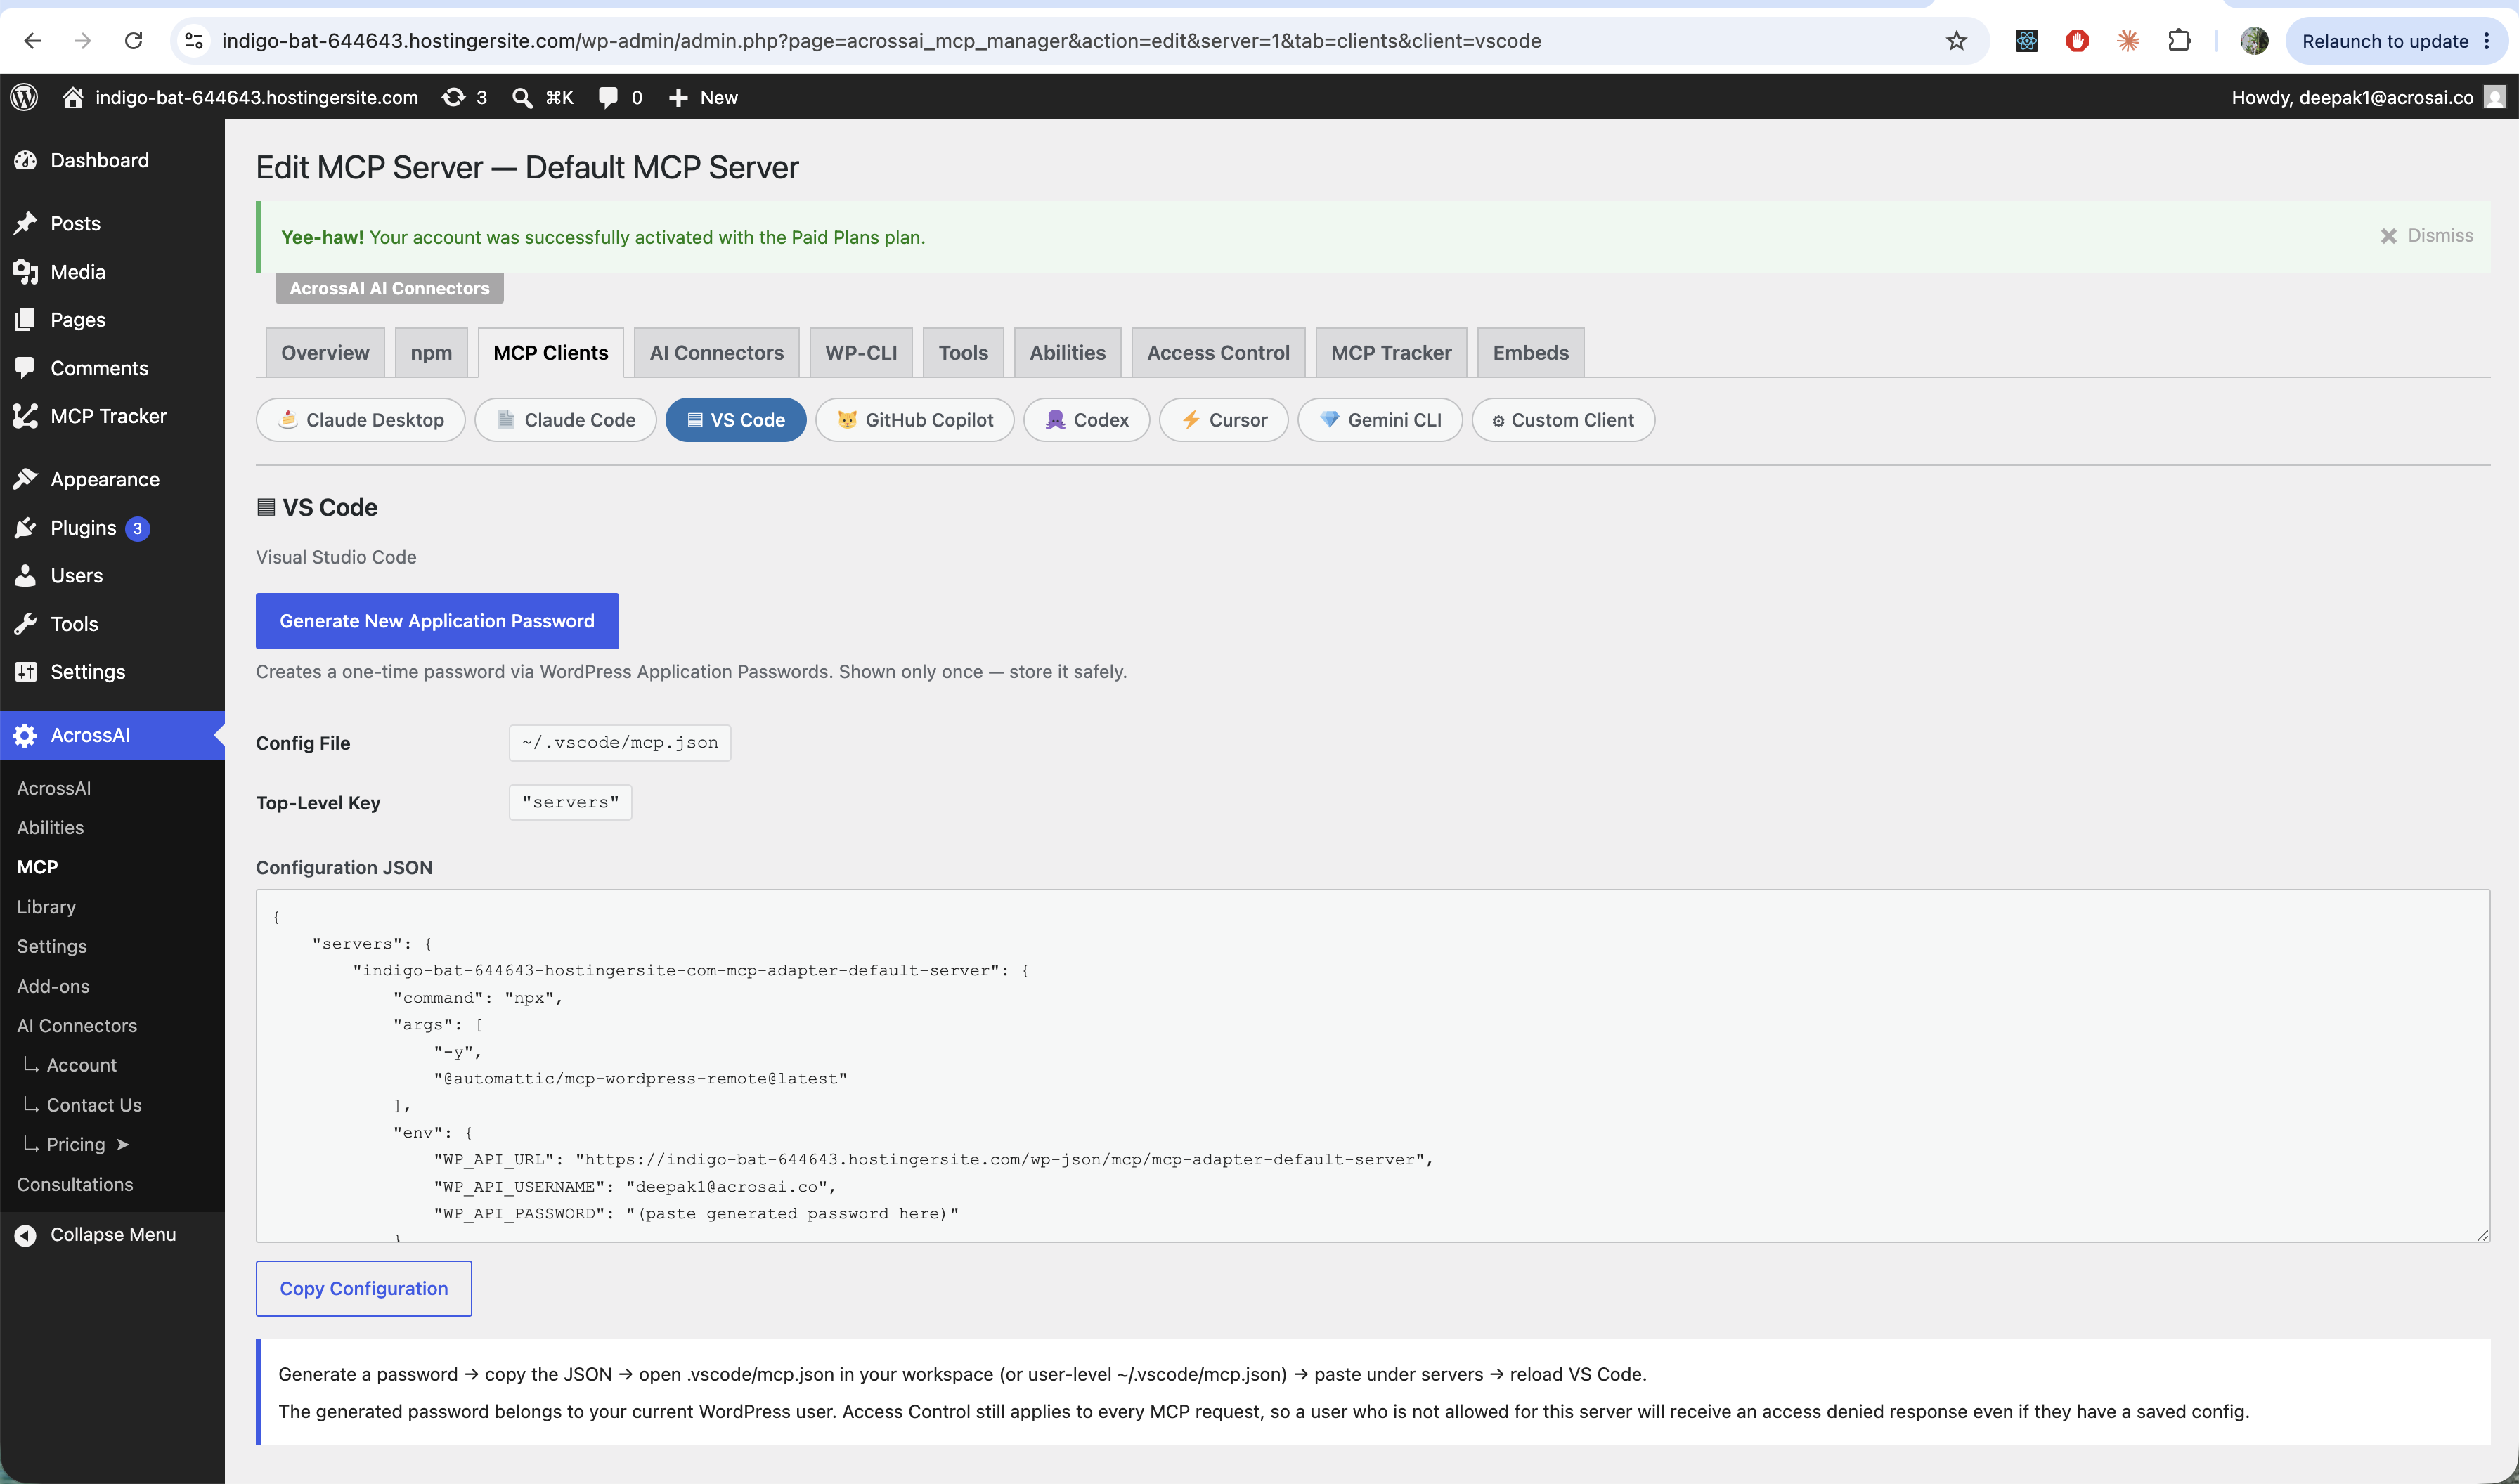
The page always shows the correct path, key and JSON for the client you’ve selected — you never have to remember them. The config uses the standard @automattic/mcp-wordpress-remote package, so it works the same way across clients.
Good to know: The password belongs to your WordPress user. Access Control still applies to every request, so a user who isn’t allowed on the server is refused even with a valid config.
Note: For how to create an application password — and how to revoke one when a client no longer needs access — see Application passwords & security.