
What the MCP Adapter does
The Model Context Protocol is an open standard for how applications hand context to AI models. The MCP Adapter is WordPress’s implementation of it, built and maintained by the WordPress AI Team as part of their AI Building Blocks initiative. It takes the abilities registered on your site through the Abilities API and translates them into MCP tools, resources and prompts, so an AI client like Claude, ChatGPT or VS Code can discover what your site can do and call it directly.
That is genuinely powerful, and the Adapter does the hard part well. The catch is that it was built as a library for developers, not as a product for site owners. Setting it up means writing PHP. You register your MCP server in code. You decide in code which abilities that server exposes. You wire up authentication yourself. And every time you want to change any of it — expose one more ability, lock a server down to editors only, point a second client at the site — you edit a file and deploy it.
For a developer with SSH access that is a mild inconvenience. For everyone else it is a wall. A site owner who wants their AI assistant to help manage their WordPress site has no way in at all.
MCP Manager gives the Adapter a UI
That is the gap AcrossAI MCP Manager fills. It is built directly on top of the MCP Adapter — it ships the Adapter and uses it for all the actual protocol work — and puts an admin interface over every decision the Adapter expects you to make in code.
Concretely, that means the things that used to be PHP are now screens:
- Which servers exist — create, rename, enable and disable them from a list table.
- Which abilities each server exposes — a searchable, filterable list with toggles.
- Which of those become callable tools — a two-column picker.
- Who is allowed to connect — a permissions panel per server.
- How a client connects — ready-made configs you copy and paste.
The protocol does not change. The Adapter still does the translating and still owns the transport. What changes is who gets to make the decisions: a site owner in a browser, instead of whoever last had commit access.
Installing it
MCP Manager is free on WordPress.org, so you can add it straight from your dashboard. You need WordPress 7.0 or newer, PHP 8.1 or newer, and an administrator account.
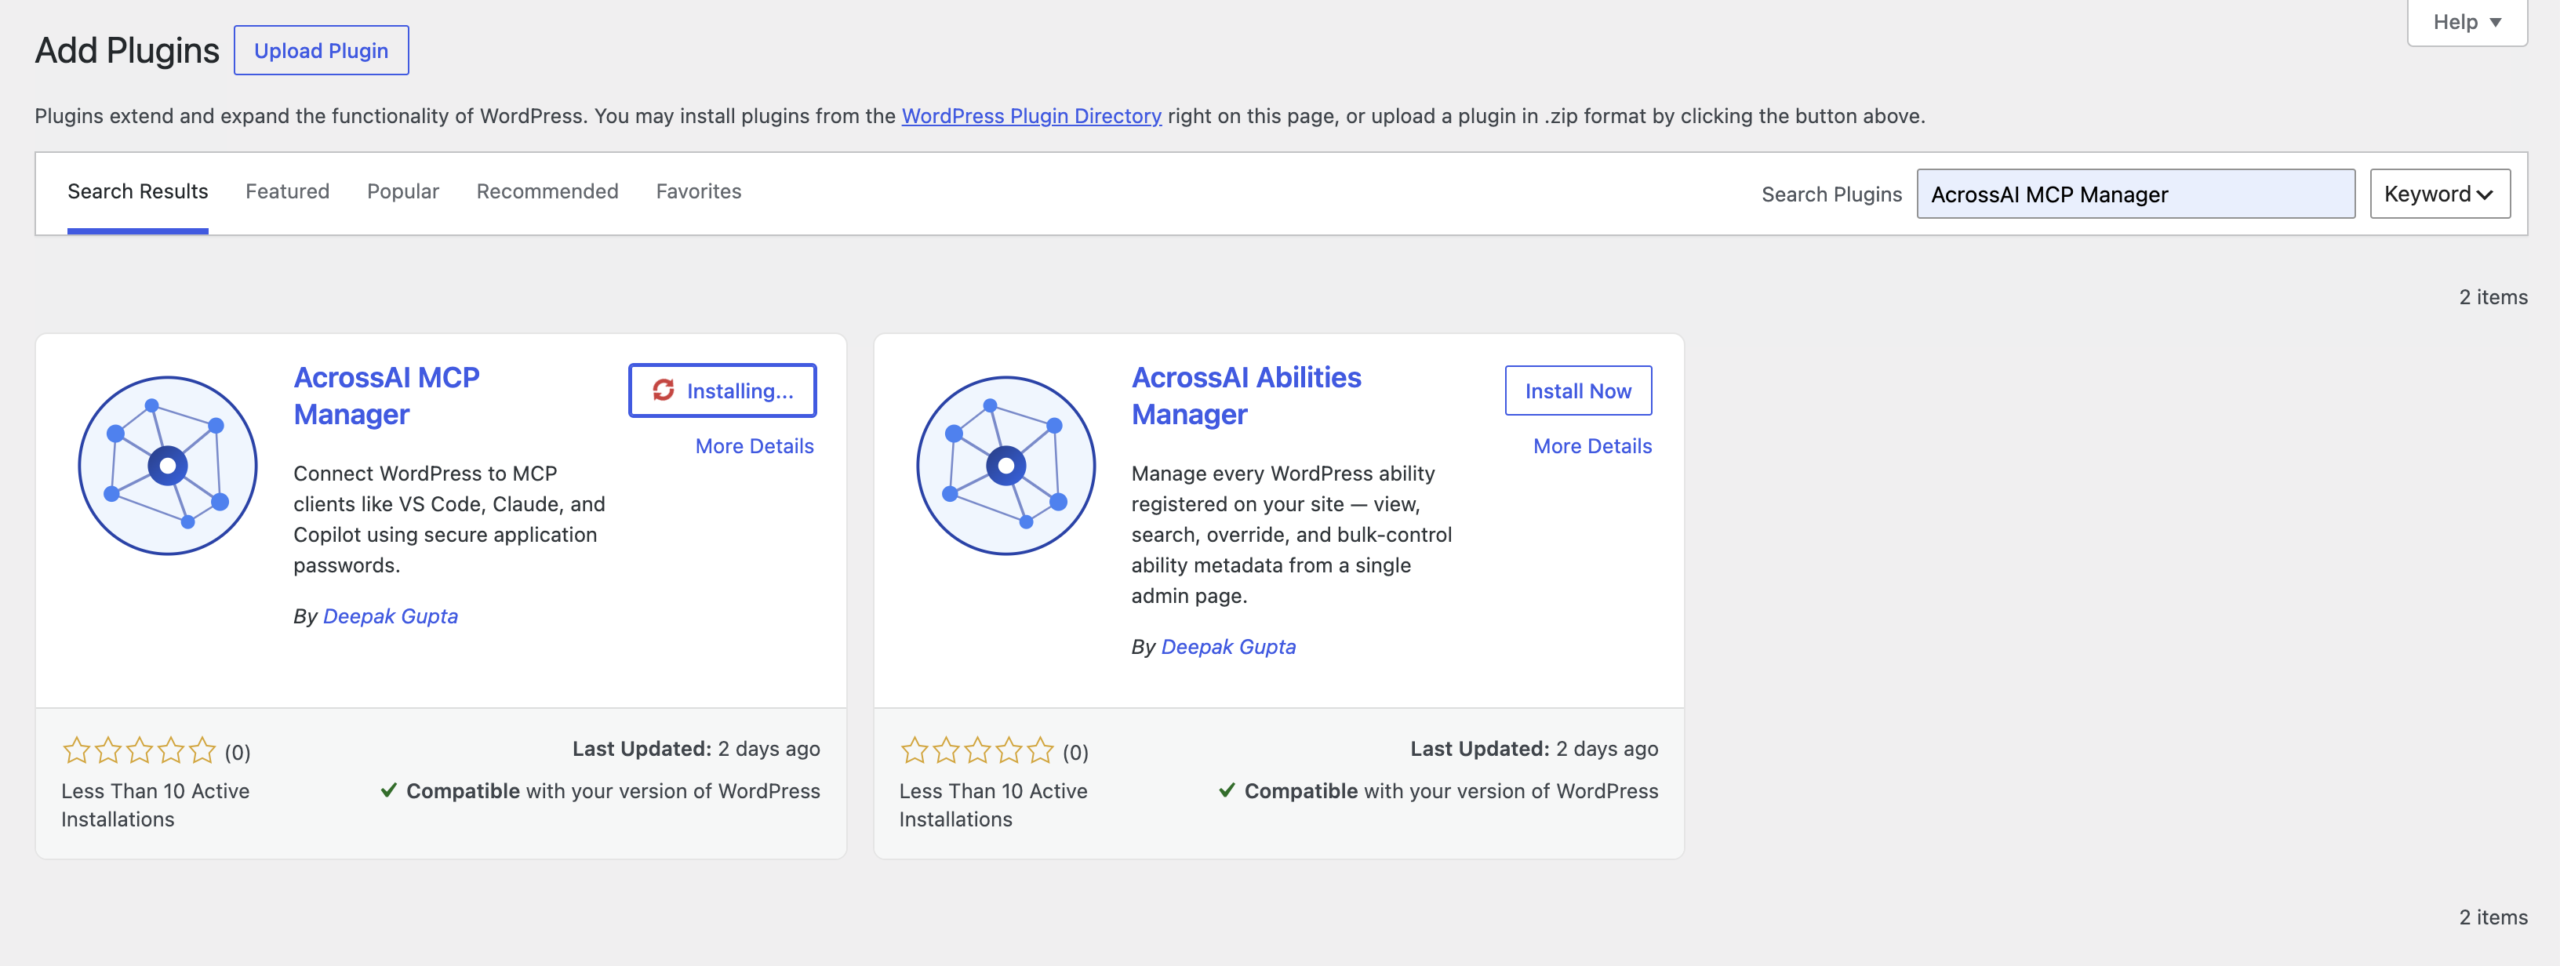
- Go to Plugins → Add New Plugin.
- Search for AcrossAI MCP Manager.
- Click Install Now, then Activate.
Full details are in the install and activate guide.
Your first look: AcrossAI → MCP
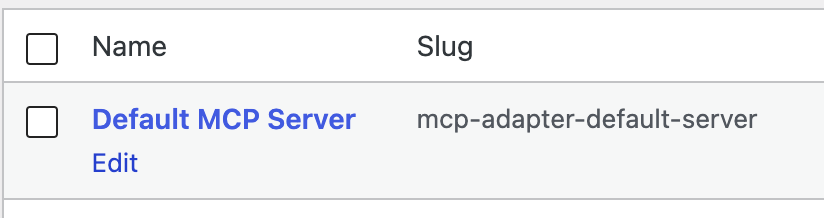
After activation, open AcrossAI → MCP in the admin menu. This is the MCP Servers screen.
You will already see a server listed — the default server that ships with the MCP Adapter. Because MCP Manager is built on top of the Adapter, it inherits that server rather than replacing it. There is nothing to create before you can start.
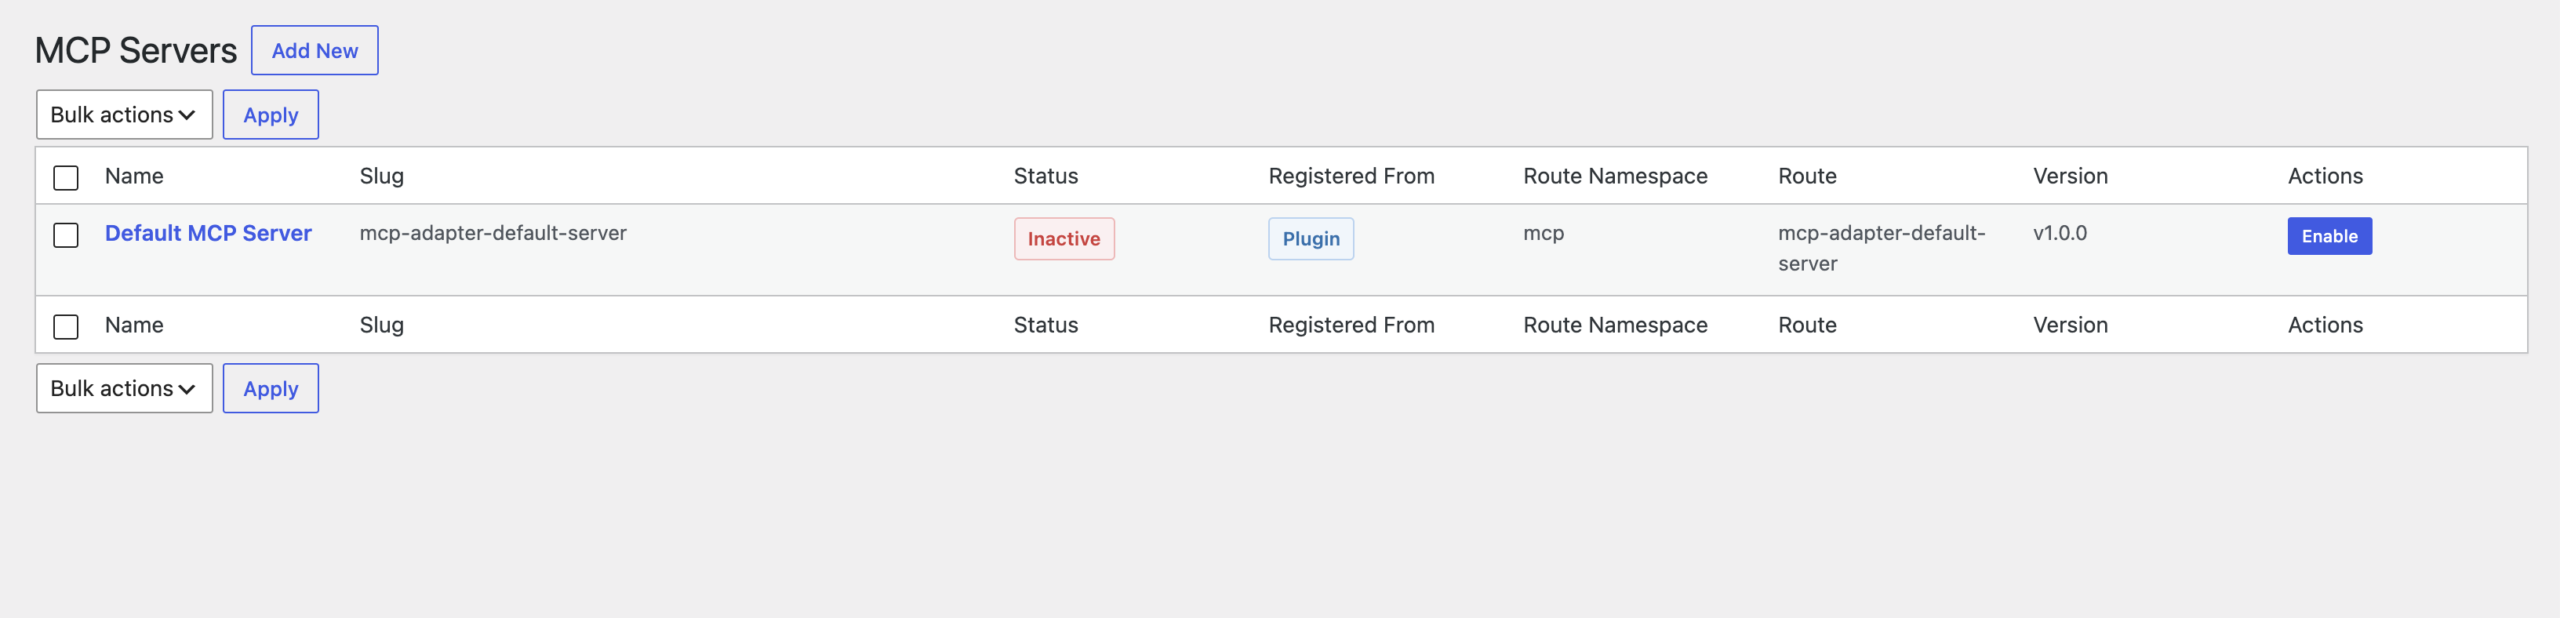
Before anyone can use it, enable the server. A disabled server is invisible to clients even if everything else is configured correctly.
Once it is enabled, click Edit on the server row. That opens the server’s own screen, which starts on Overview — a summary of the server’s details — with a row of tabs across the top:
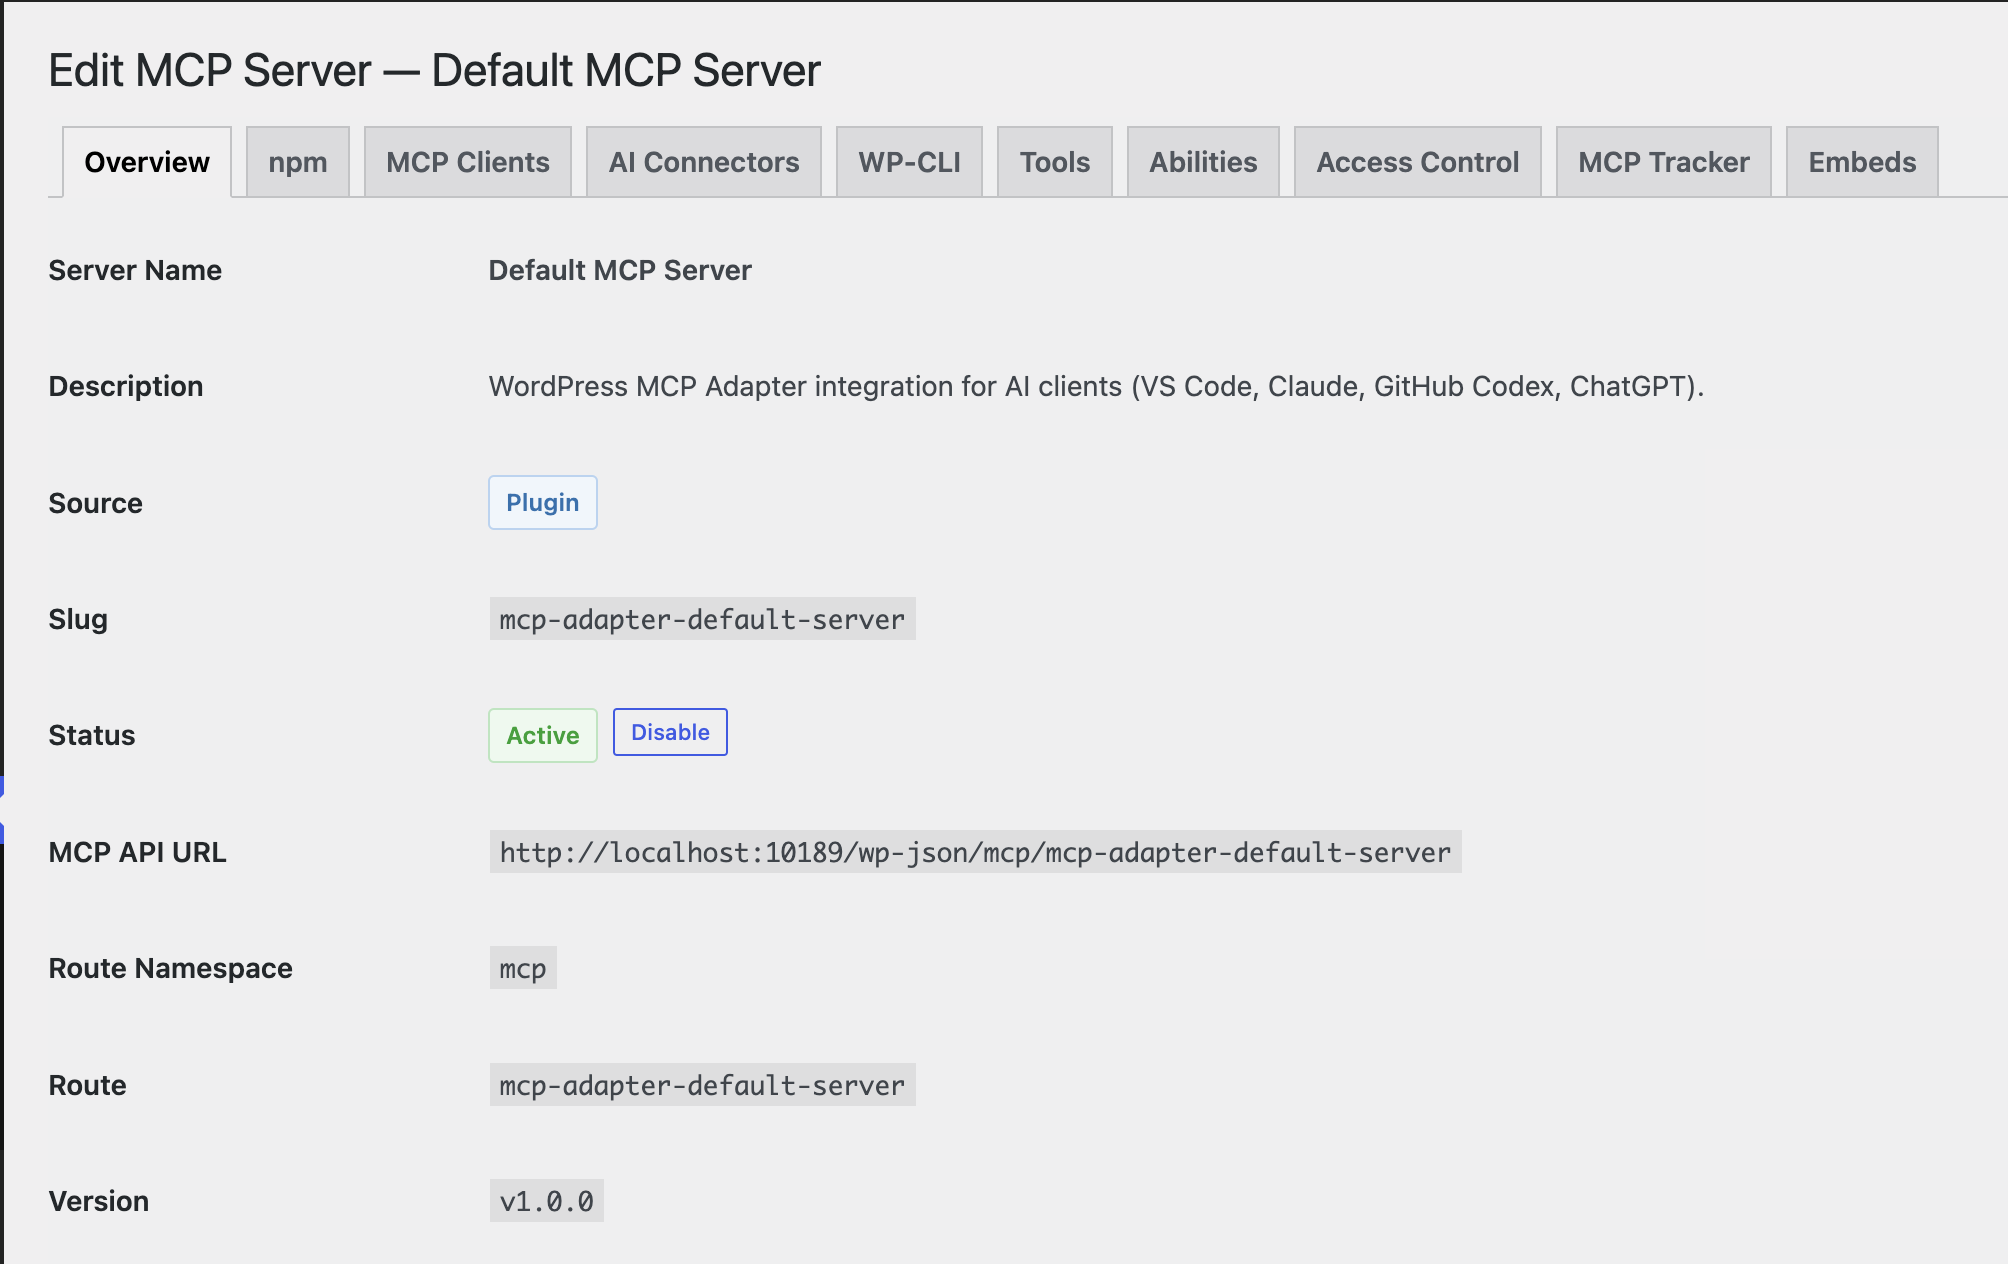
Overview · npm · MCP Clients · AI Connectors · WP-CLI · Tools · Abilities · Access Control · Log · Embeds
Four ways to connect
The first four tabs are four different routes to the same destination. Which one you want depends on where your AI client runs and how much setup you are willing to do.
| Method | Best for | Setup effort |
|---|---|---|
| AI Connectors | Hosted AI — Claude, ChatGPT, Grok | Paste one URL (paid add-on) |
| MCP Clients | Desktop and editor apps | Copy-paste a config file |
| npm (CLI connections) | Terminal users, local development | One command |
| WP-CLI | Local installs, no network exposure | Copy-paste a config file |
Note: three of these routes — npm, MCP Clients and WP-CLI — run through Node on your machine, so you need Node.js 22 or newer installed. Check with
node -vand upgrade if you are below 22. AI Connectors needs nothing installed locally.
Connecting with AI Connectors (paid add-on)
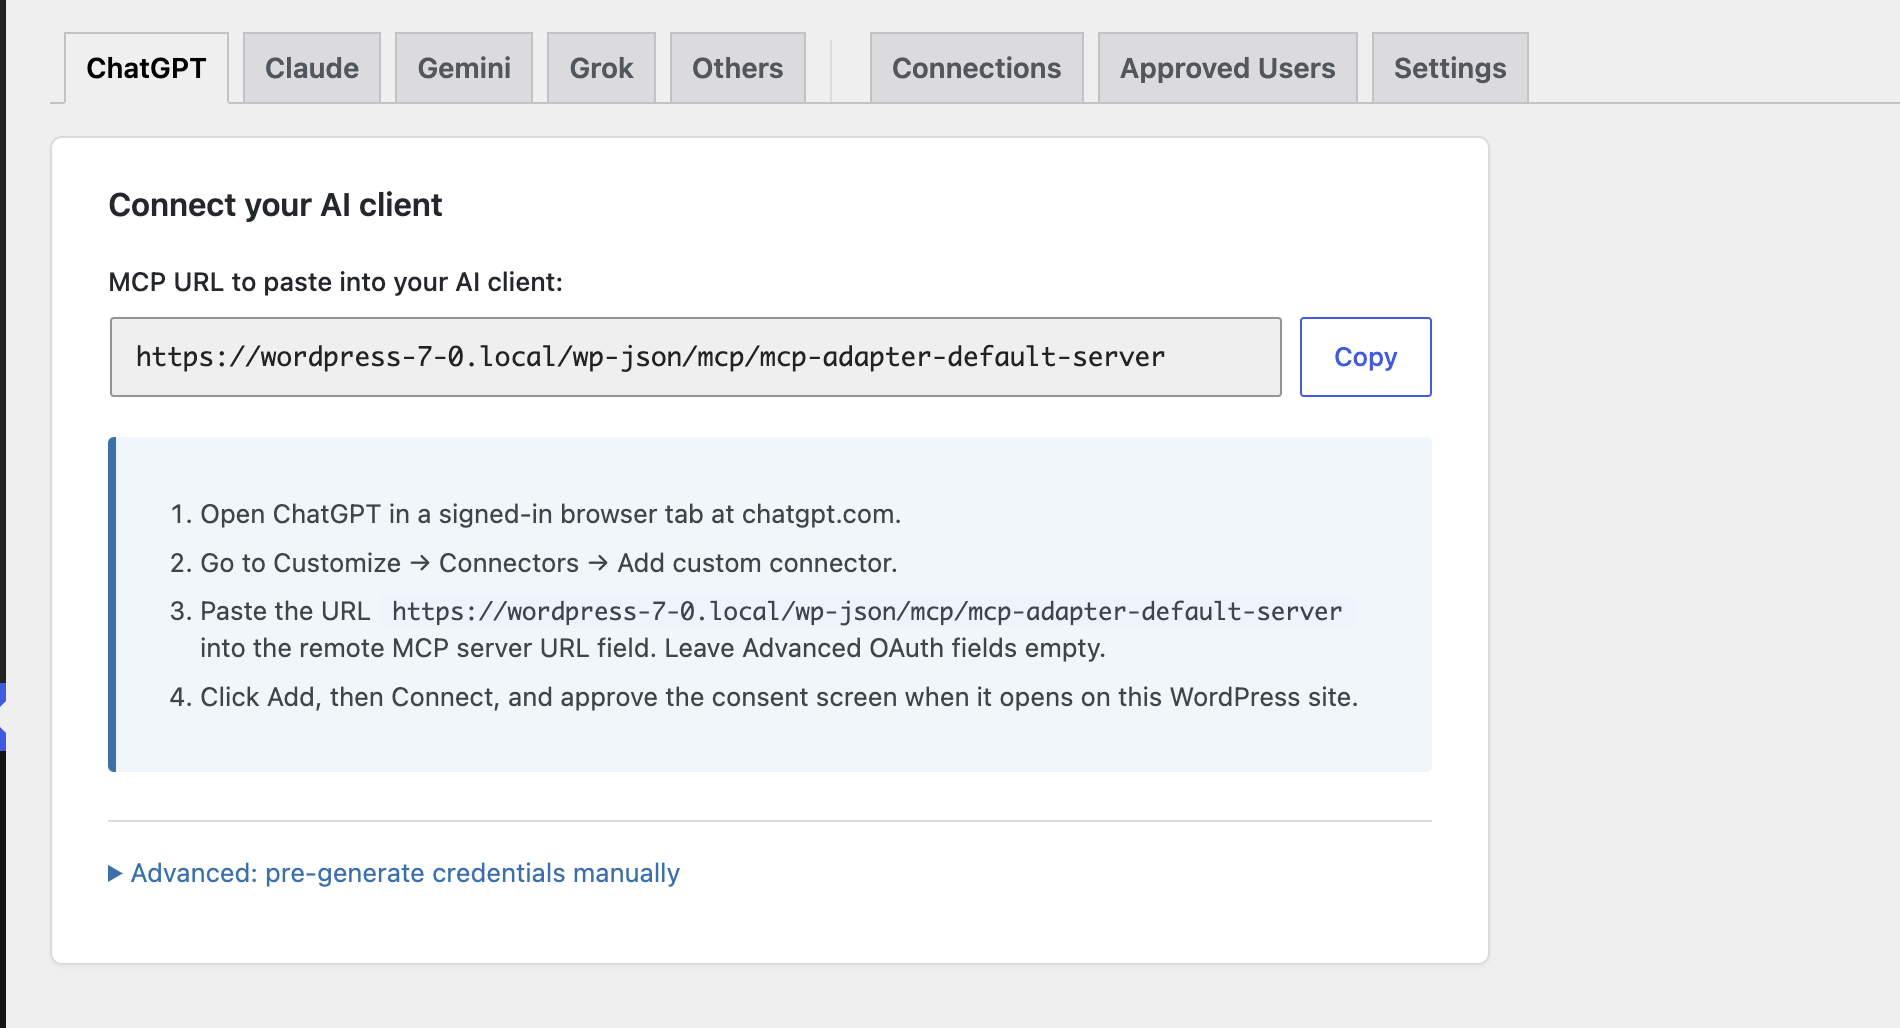
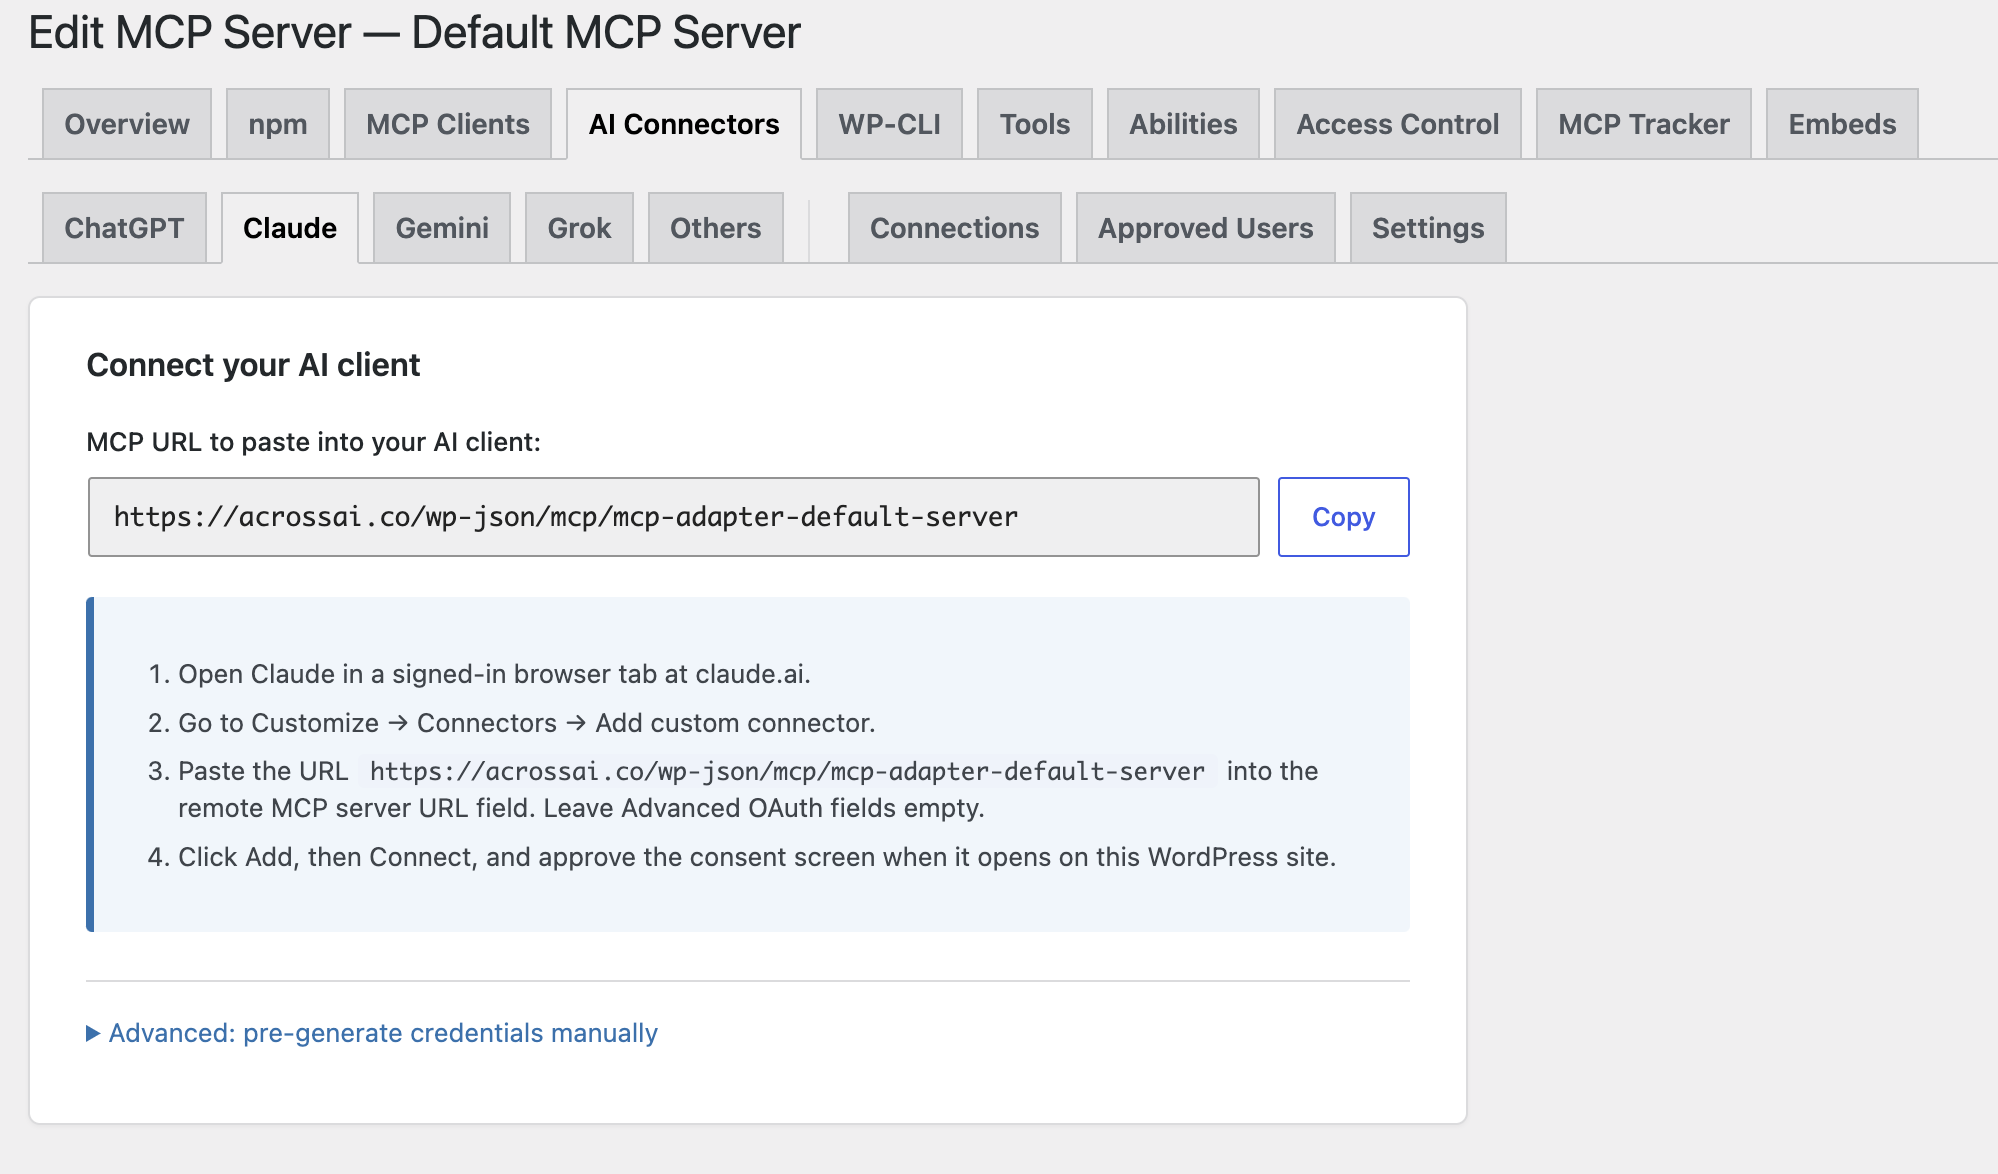
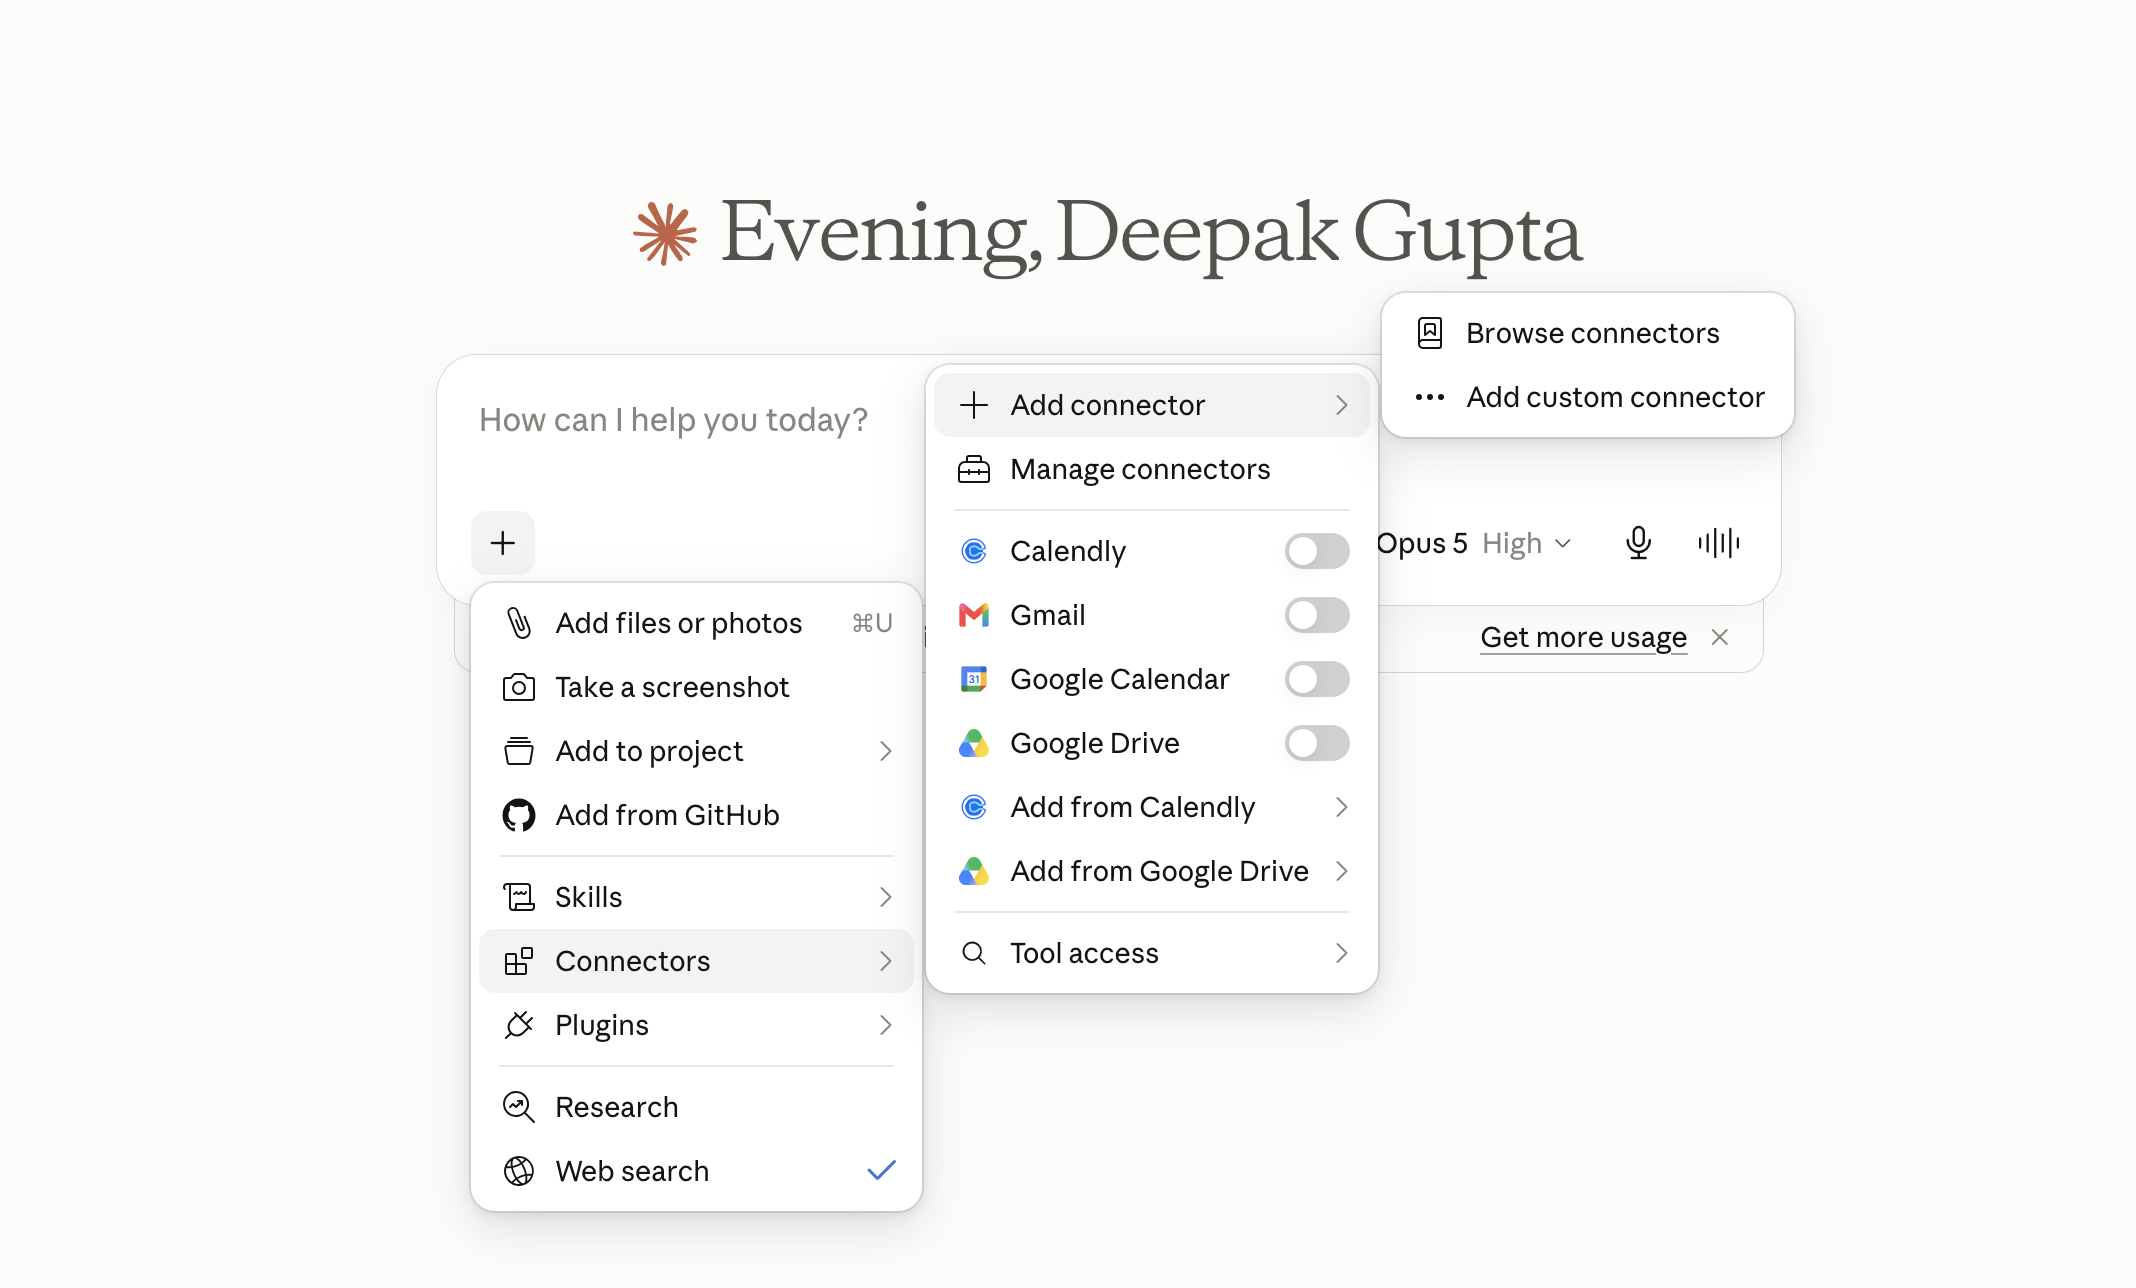
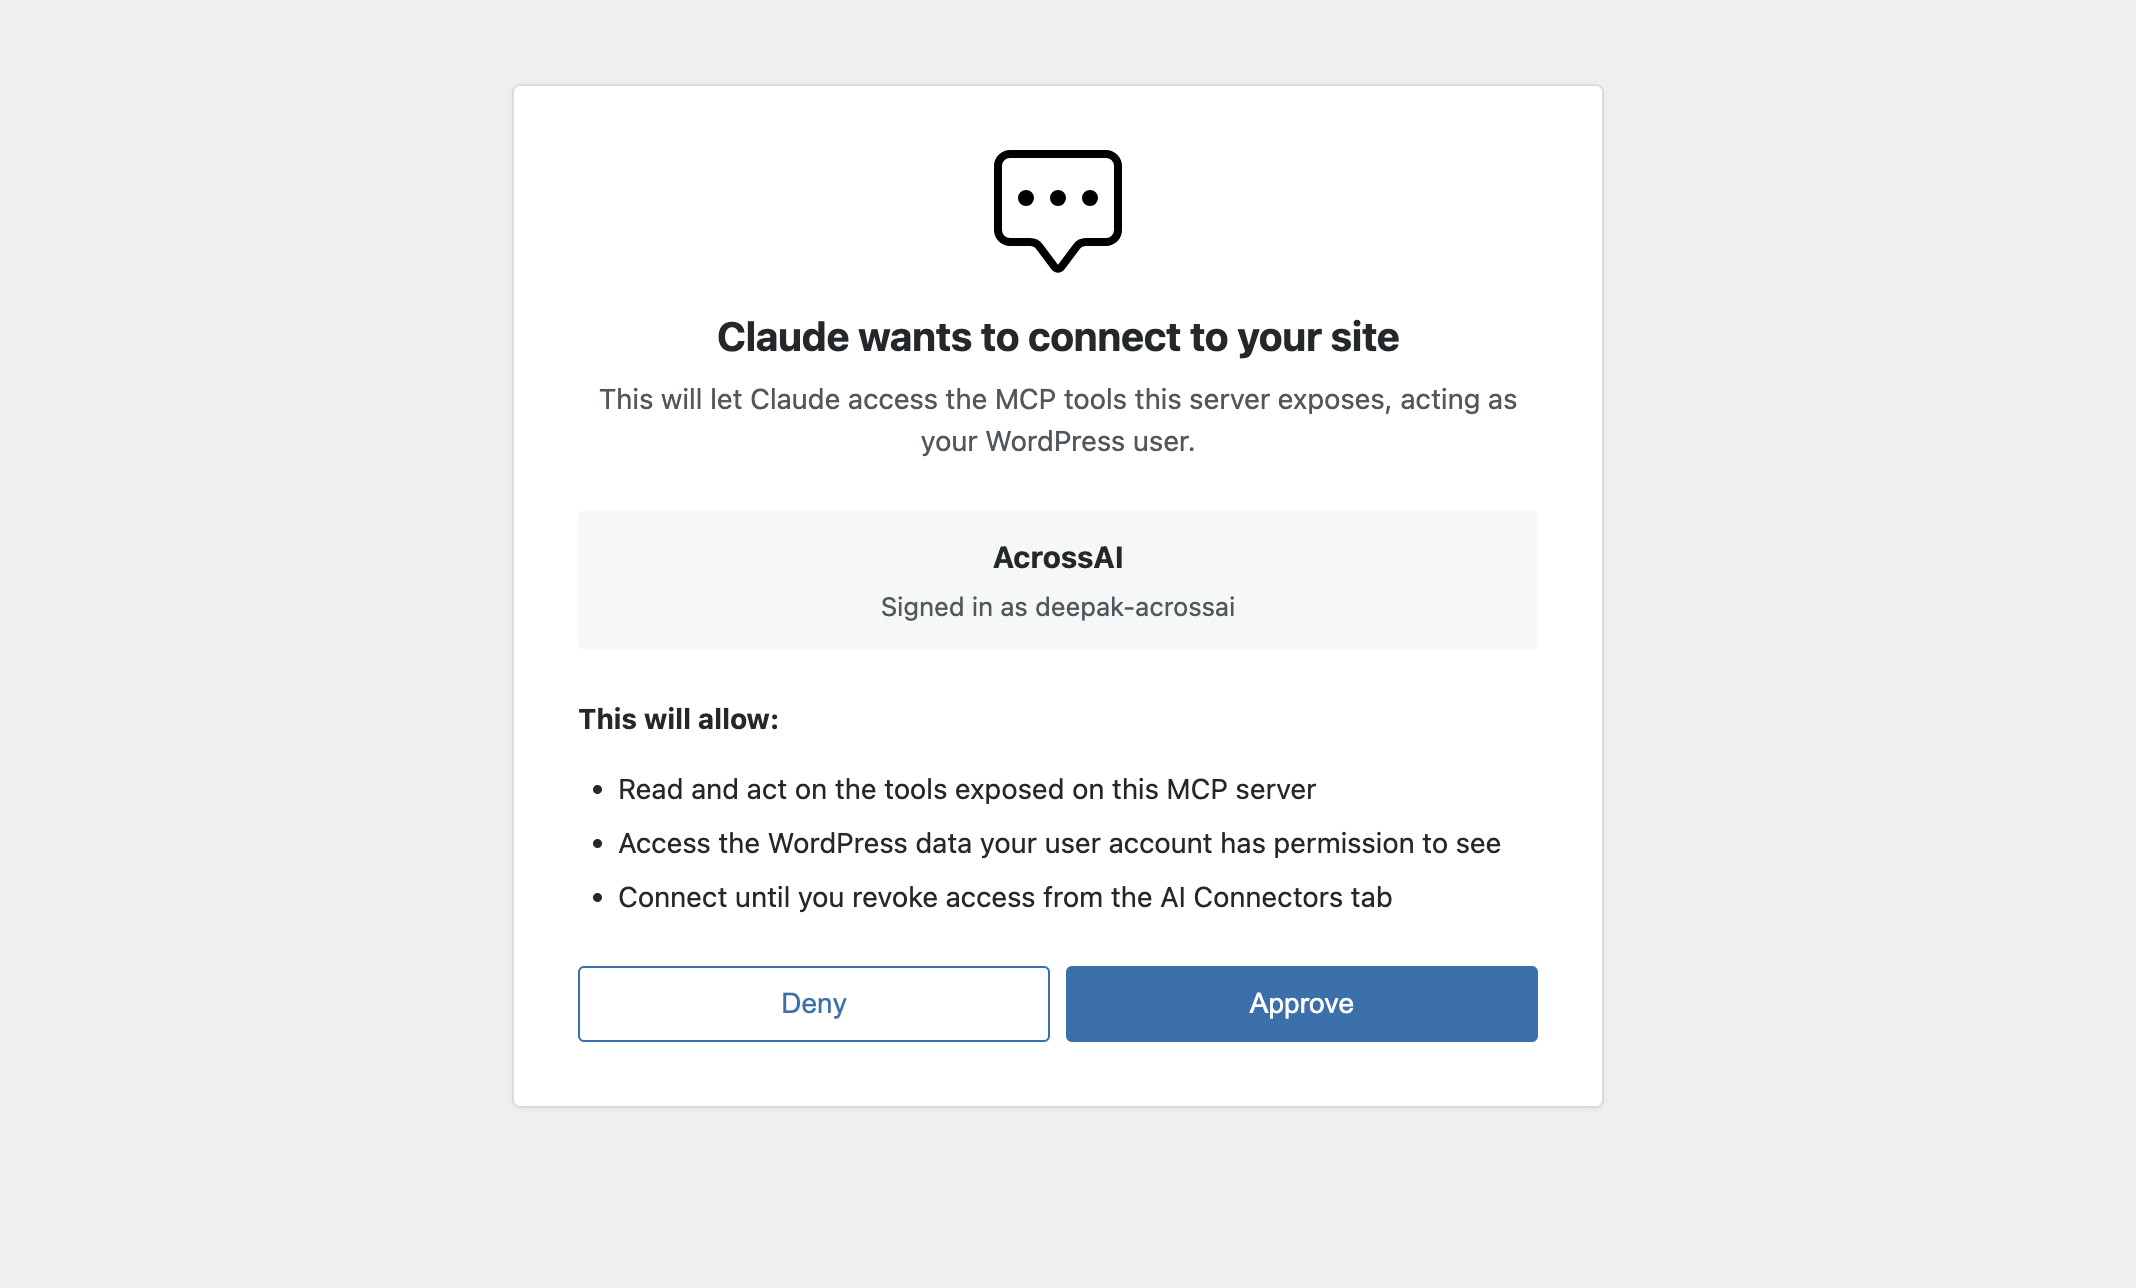
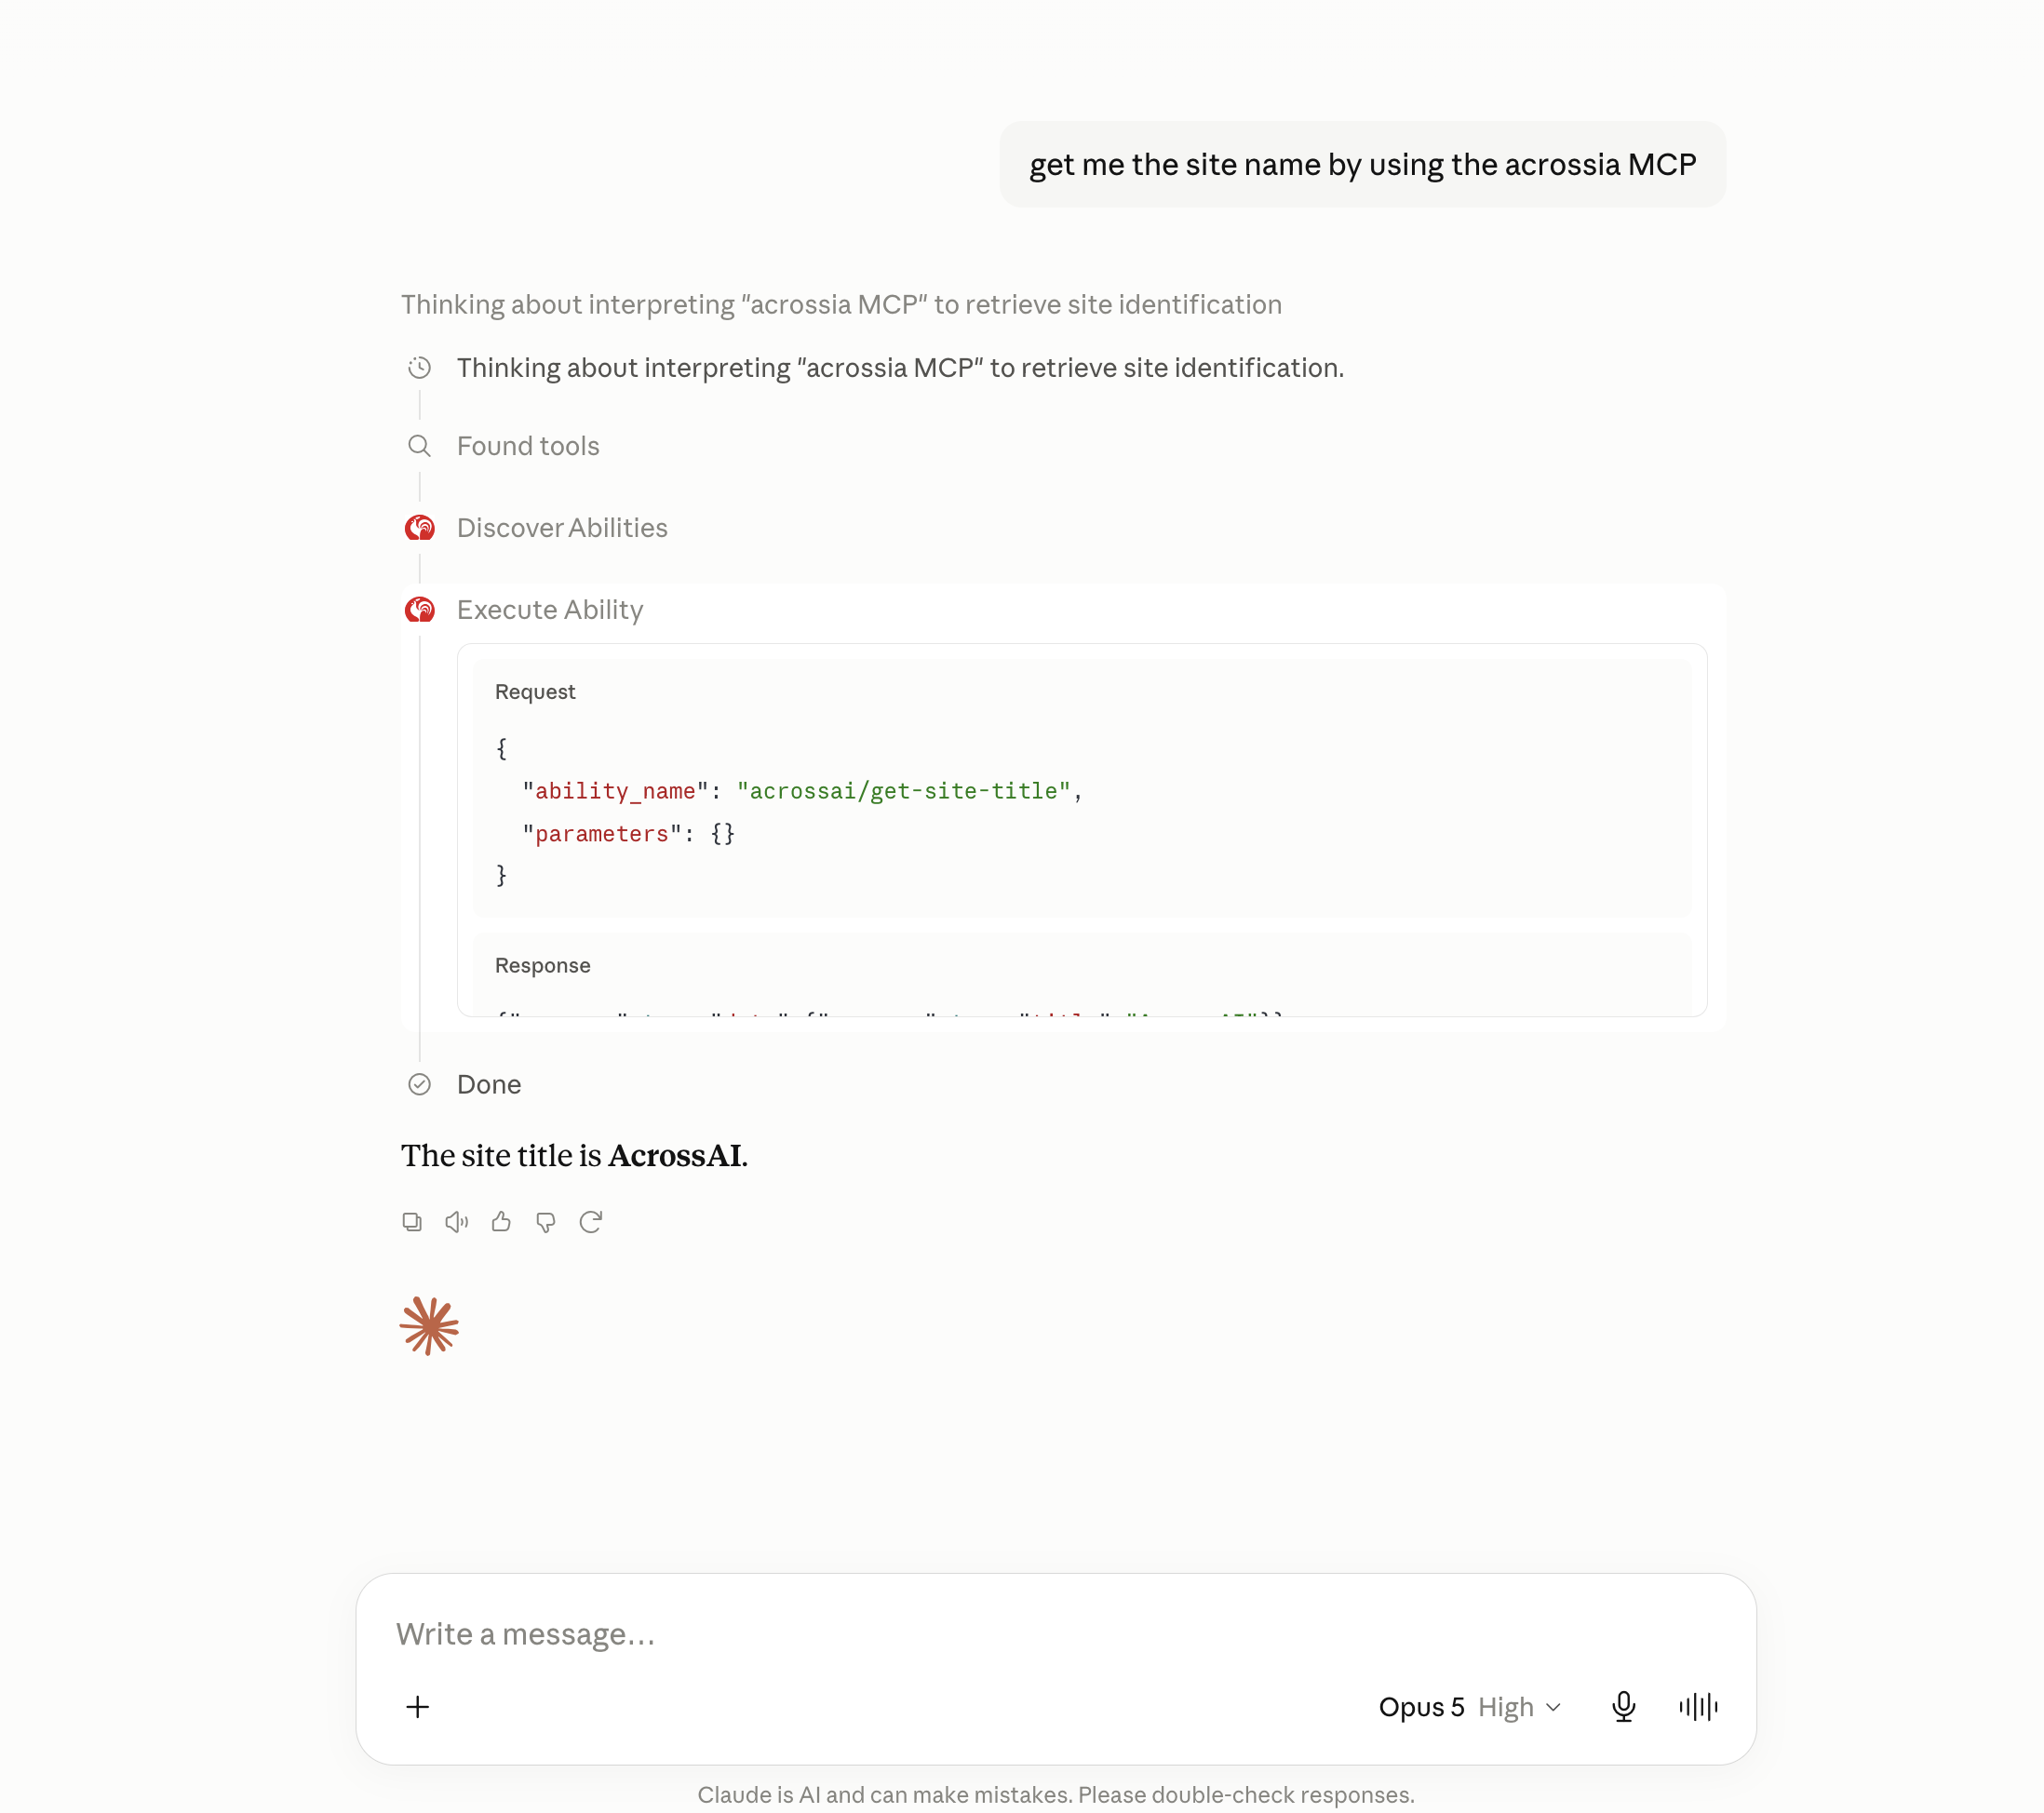
This is the simplest setup of the four, and the one to use if your AI lives in the cloud rather than on your machine. You paste one URL into Claude, ChatGPT or Grok and approve a consent screen. There is no config file and no server process to run.
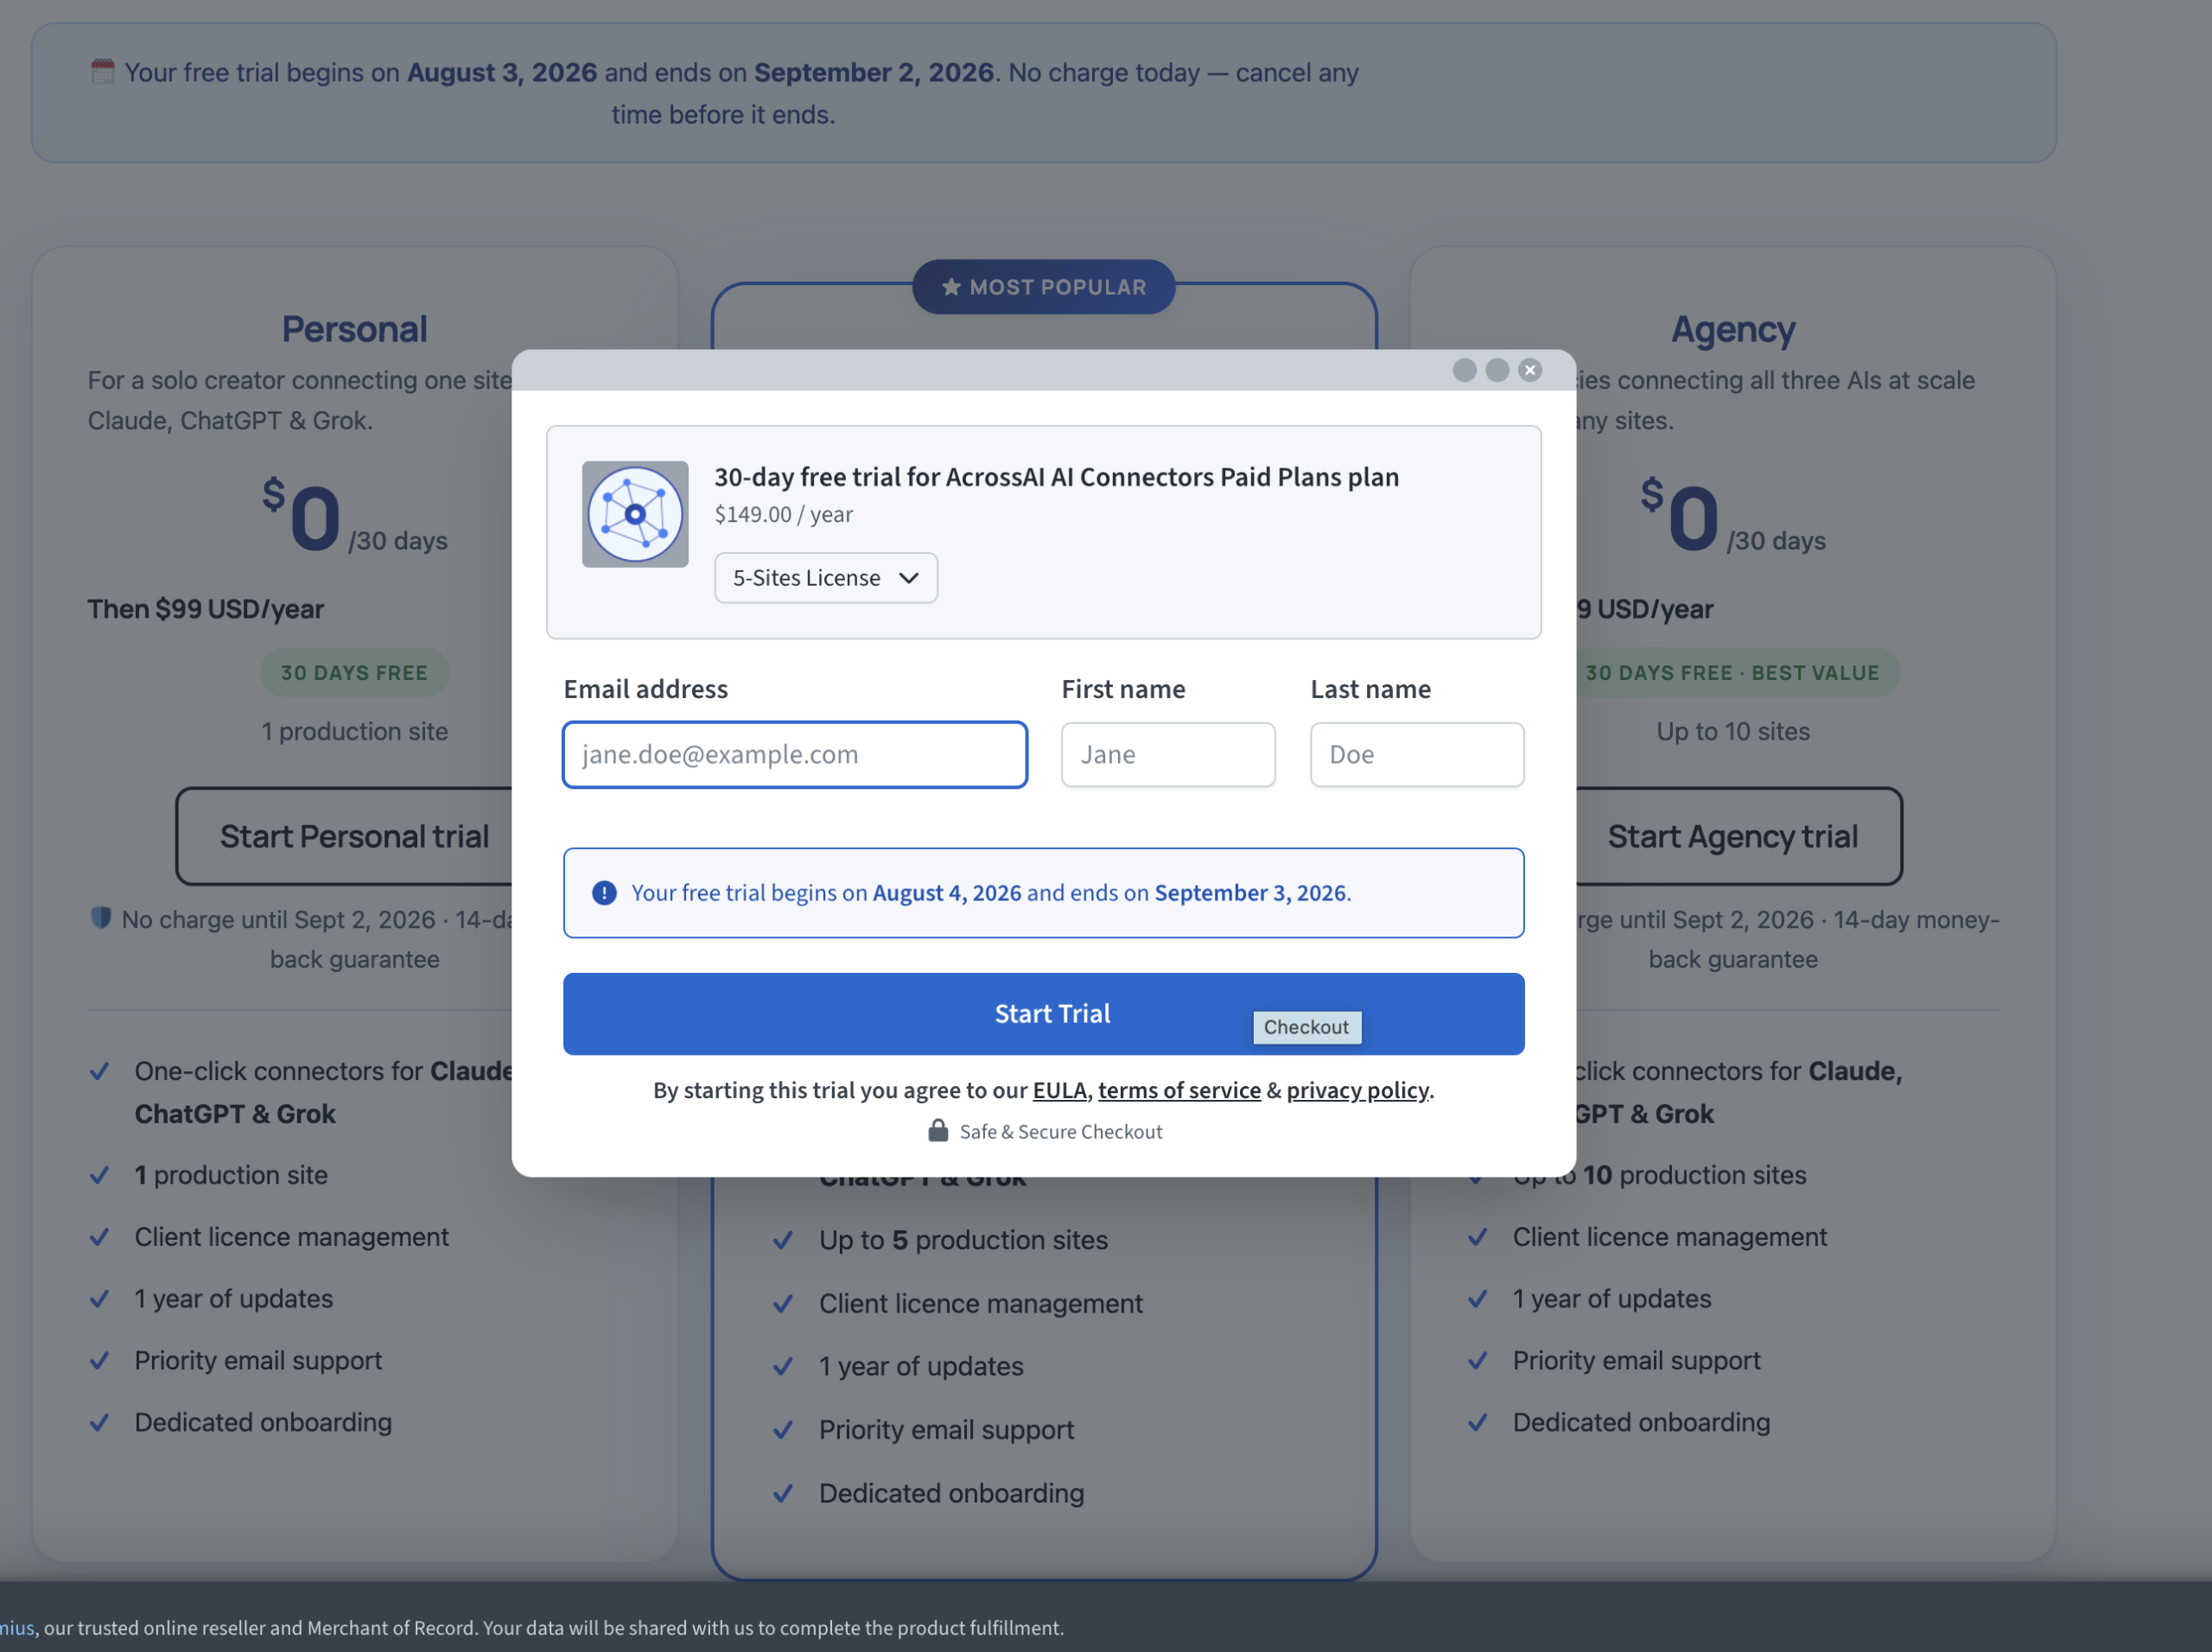
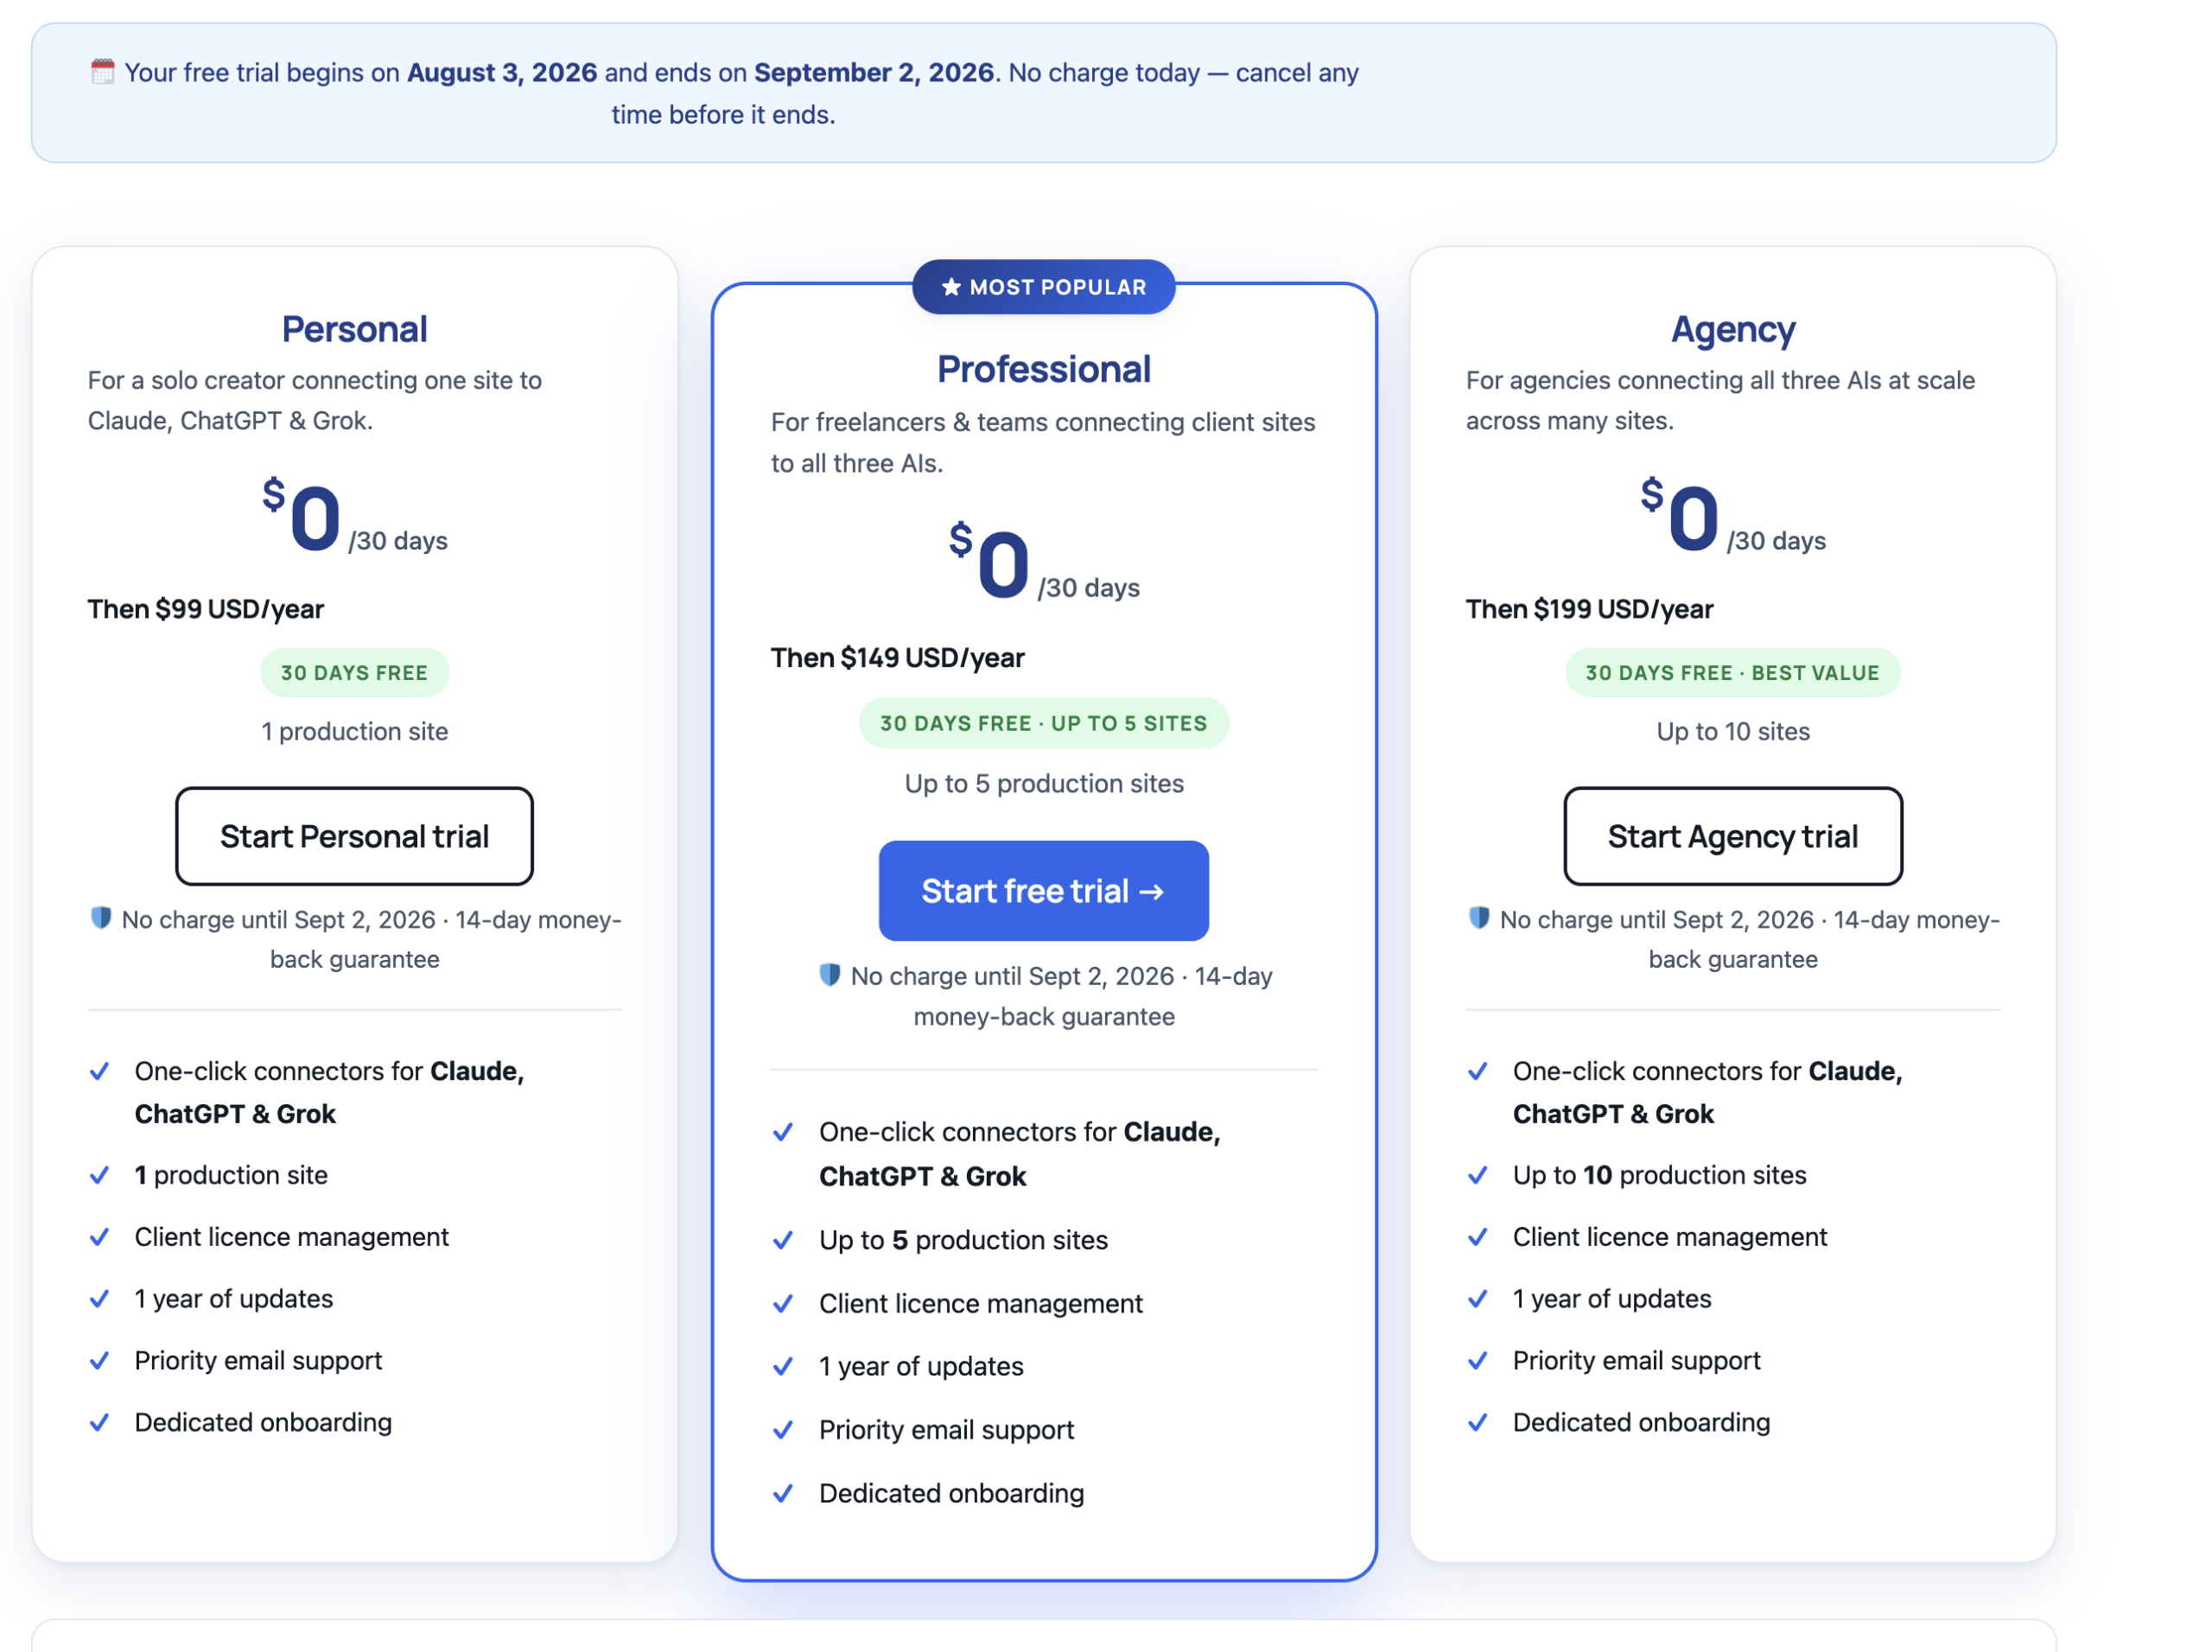
AI Connectors is a paid add-on, sold with a 30-day free trial.
- Open the AI Connectors tab.
- Click Install add-on, then Activate add-on.
- Choose your connector — Claude, ChatGPT or Grok.
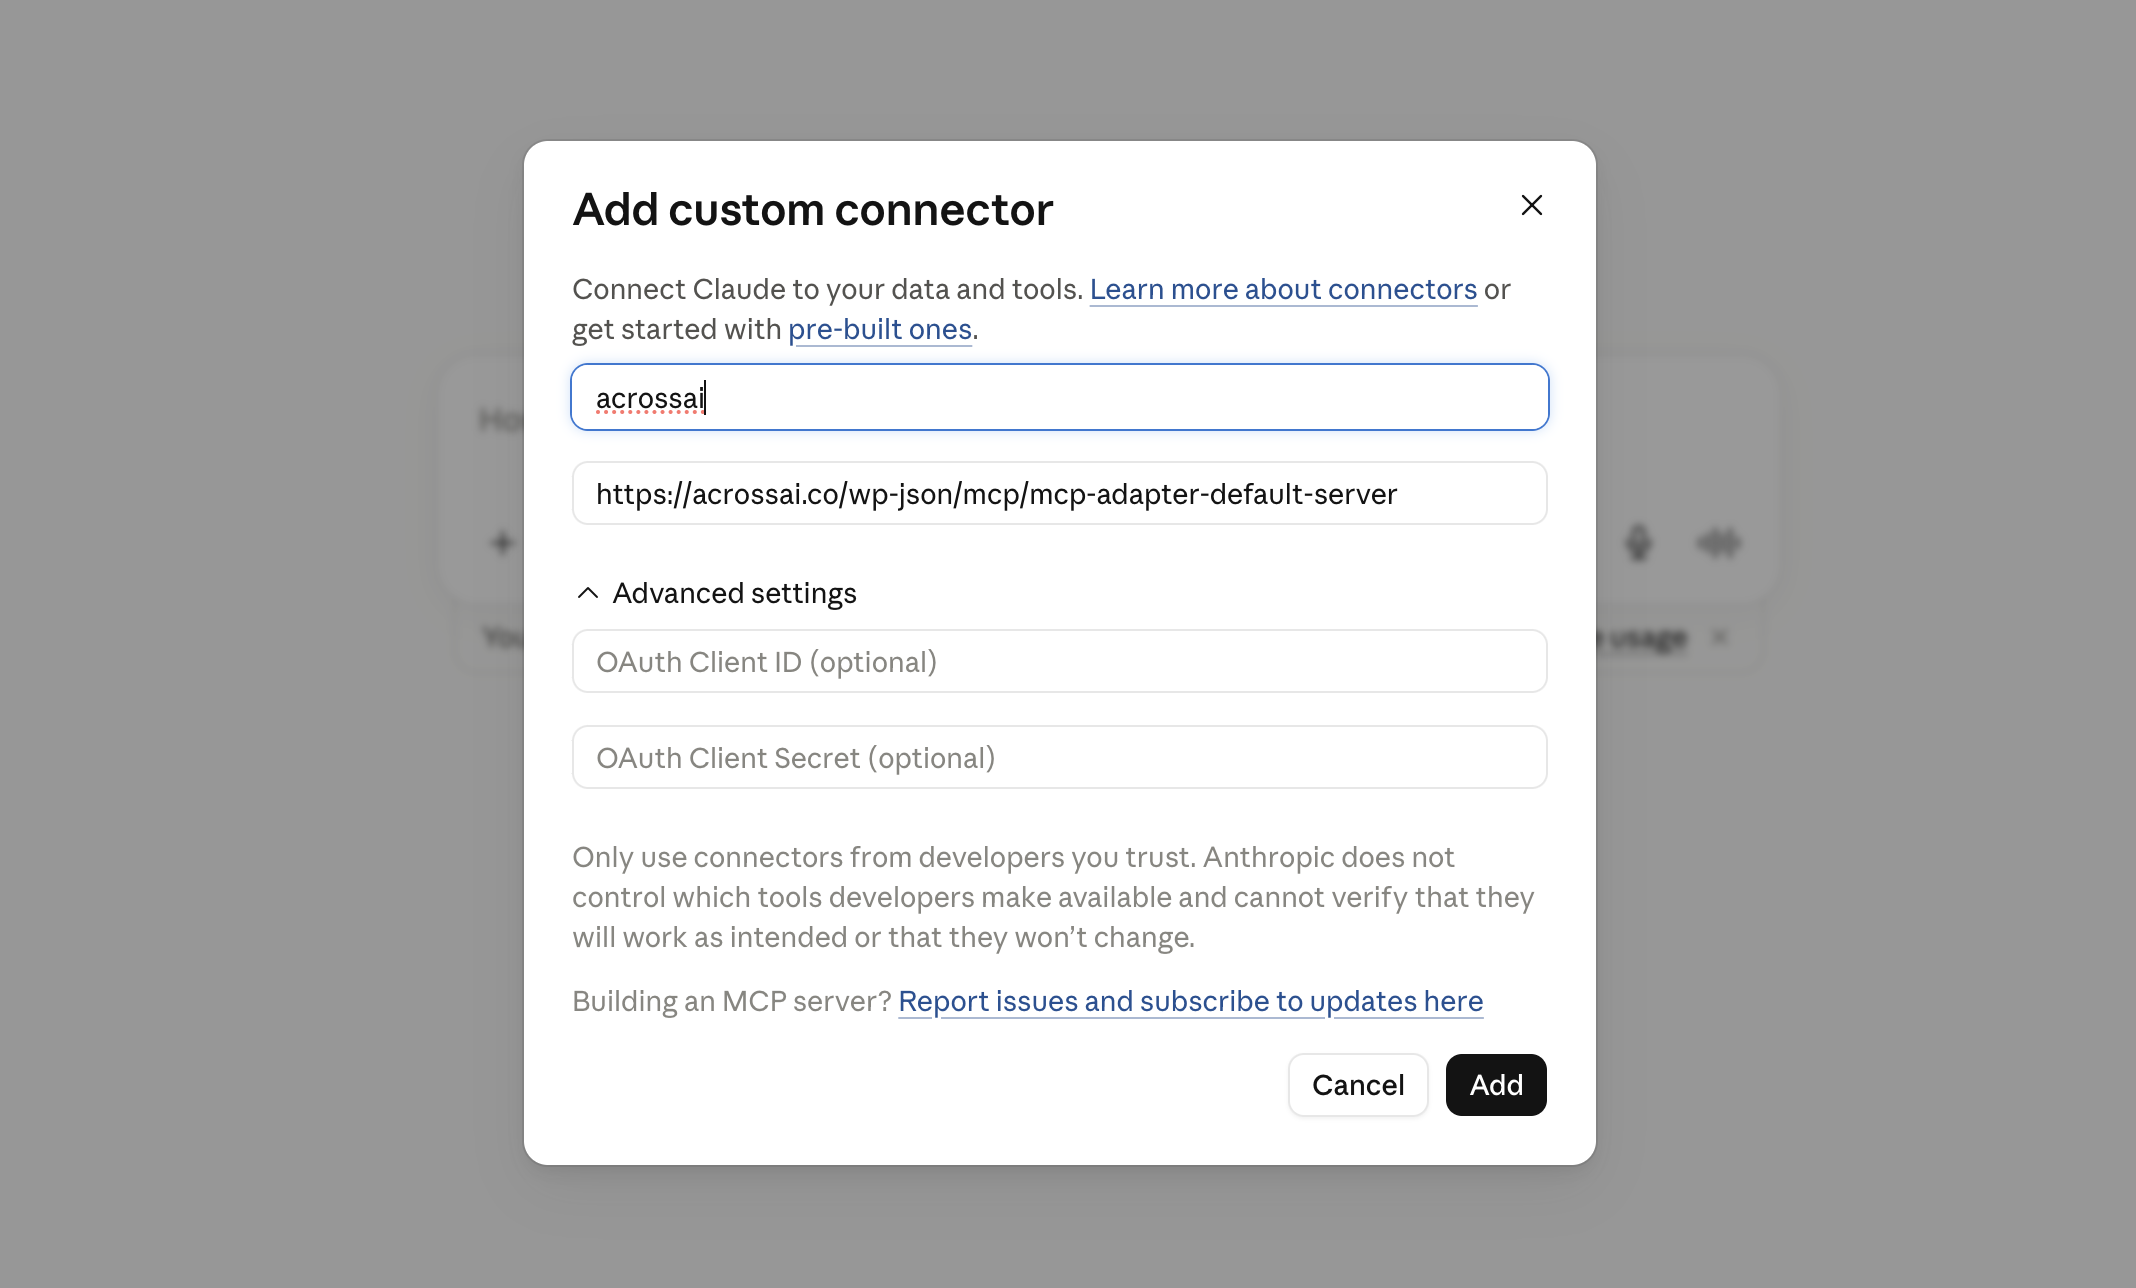
- Copy the connector URL the tab gives you.
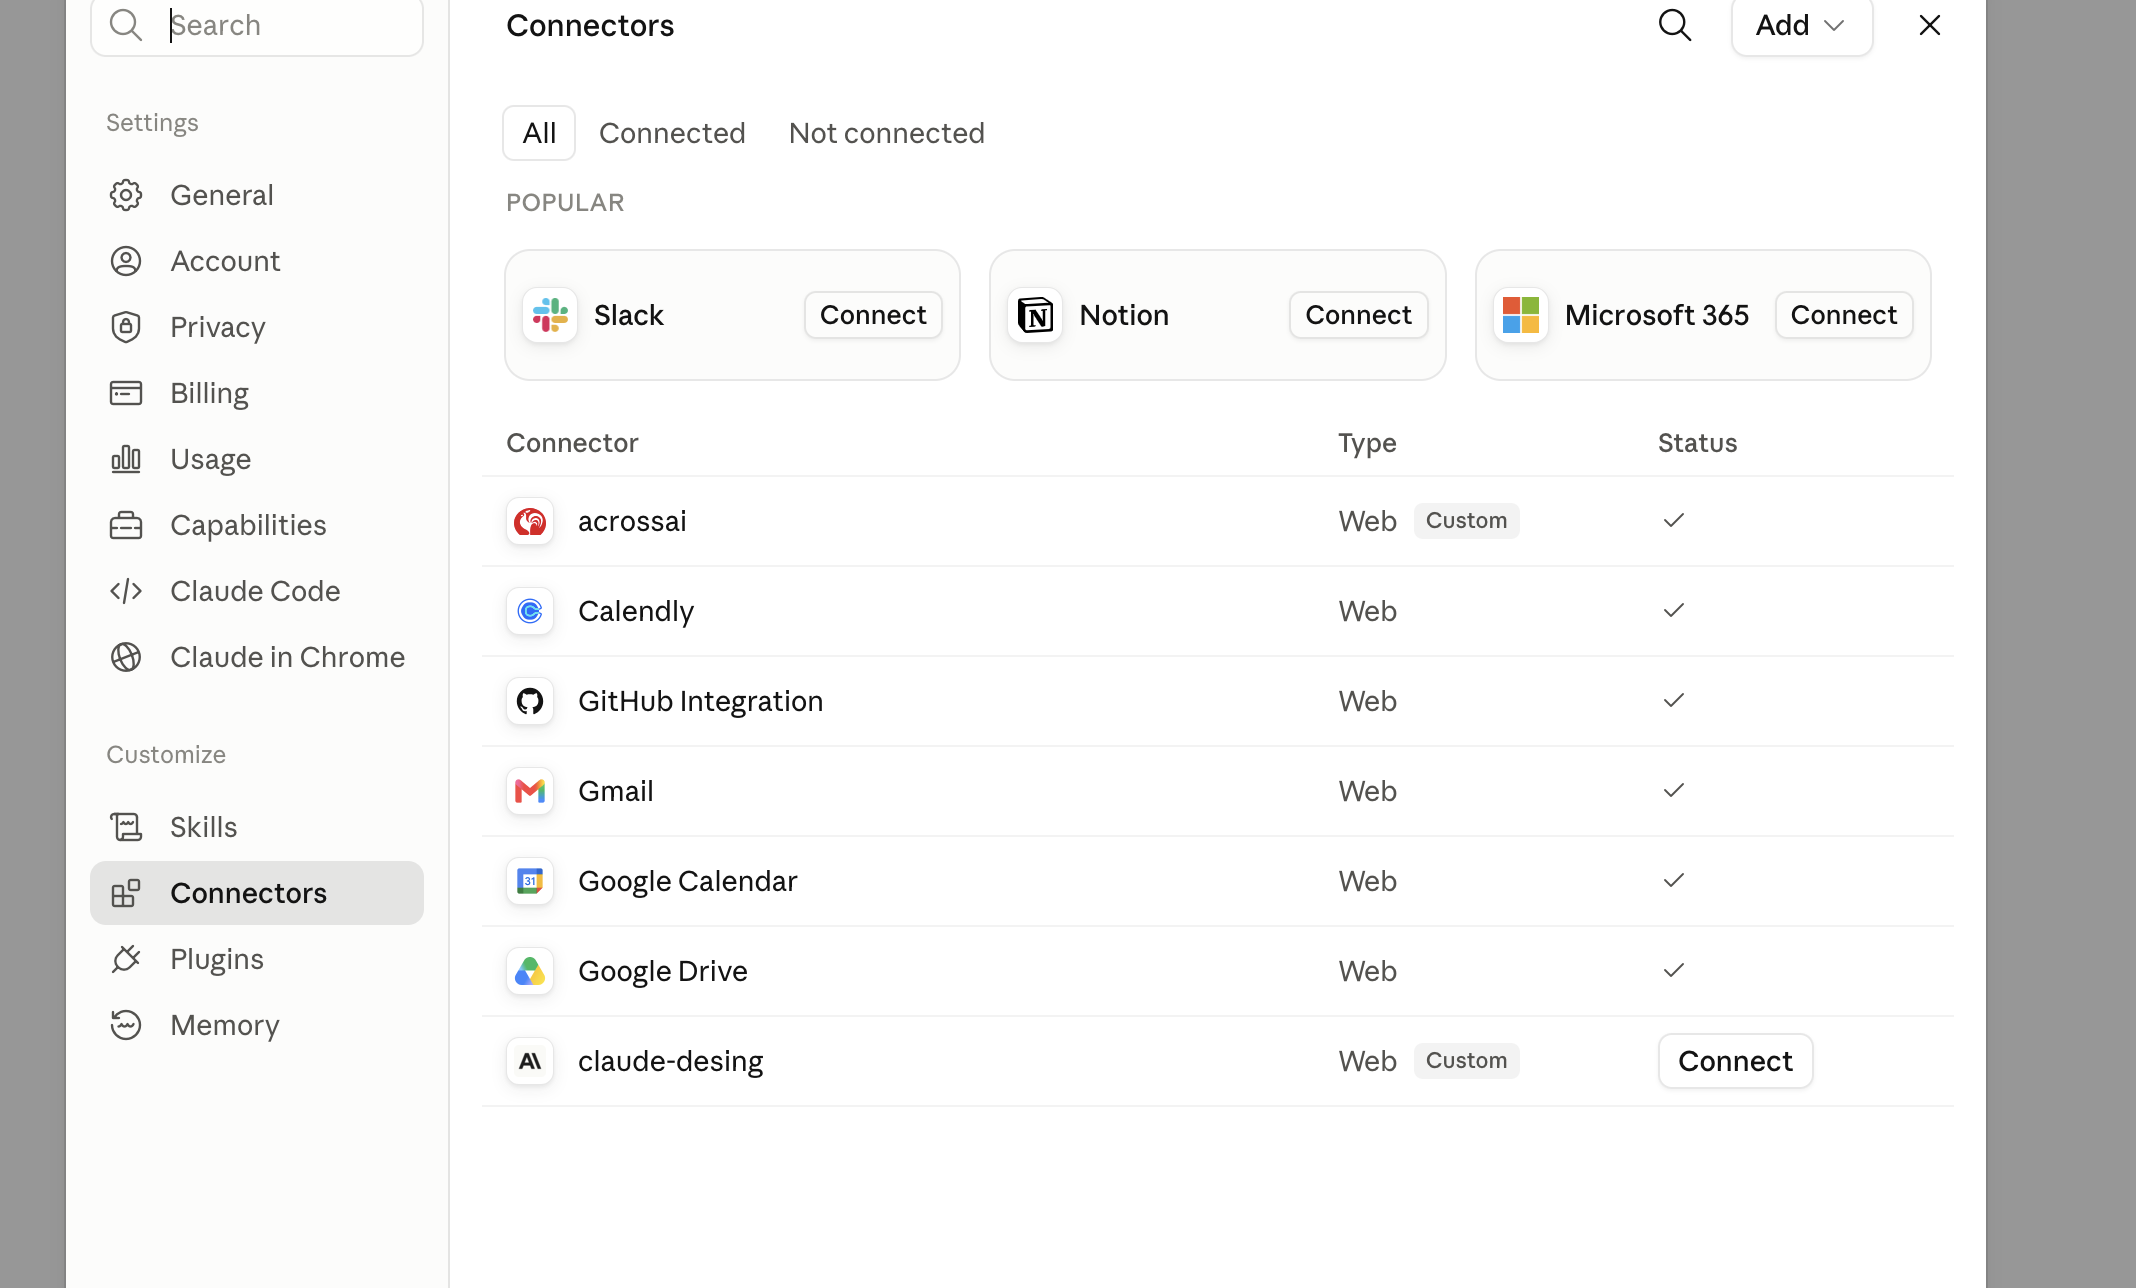
- Paste it into your AI client’s connector settings.
- Approve the consent screen.
What you get for it:
- Zero setup — no transport configuration, no server process.
- Managed authentication — OAuth flows and token storage handled for you.
- Automatic tool discovery — your server’s tools show up in the conversation.
- Granular control — enable, disable and revoke access at any time.
The Application Password flow stays fully available if you would rather not use connectors. Full details: AI Connectors.
Connecting with MCP Clients
For desktop apps and code editors — Claude Desktop, Claude Code, VS Code, GitHub Copilot, Codex, Cursor, Gemini CLI or a custom client. Pick your client’s sub-tab and the page hands you everything: a one-click application password (shown once), the exact config file path and top-level key, and a copy-paste JSON block. Paste it in, drop in the password, restart the client.
Read more: Connecting an AI client.
Connecting with npm (CLI connections)
For people working in a terminal. Enable CLI Connections in Settings (it is off by default), copy the command from the npm tab, and run it. Your browser opens an approval page; approve it, and the CLI receives a one-time application password and writes your client config for you. Every attempt is recorded in the CLI Connection Log on the same tab.
npx -y @acrossai/mcp-manager --siteurl=https://example.com --server=default-mcp-serverRead more: CLI connections (npm / npx).
Connecting with WP-CLI (STDIO transport)
For local installs. Instead of calling the network endpoint, the client launches WP-CLI as a subprocess — the STDIO transport — so no credentials travel over the network at all. Copy the STDIO config block from the WP-CLI tab into your client’s config file, save, and restart the client; it starts the server itself.
wp mcp-adapter serve --server=<slug> --user=adminRead more: WP-CLI (STDIO transport).
For the rest of this walkthrough we will use AI Connectors, since it is the route most site owners will take. Here it is in detail.
The Tools tab
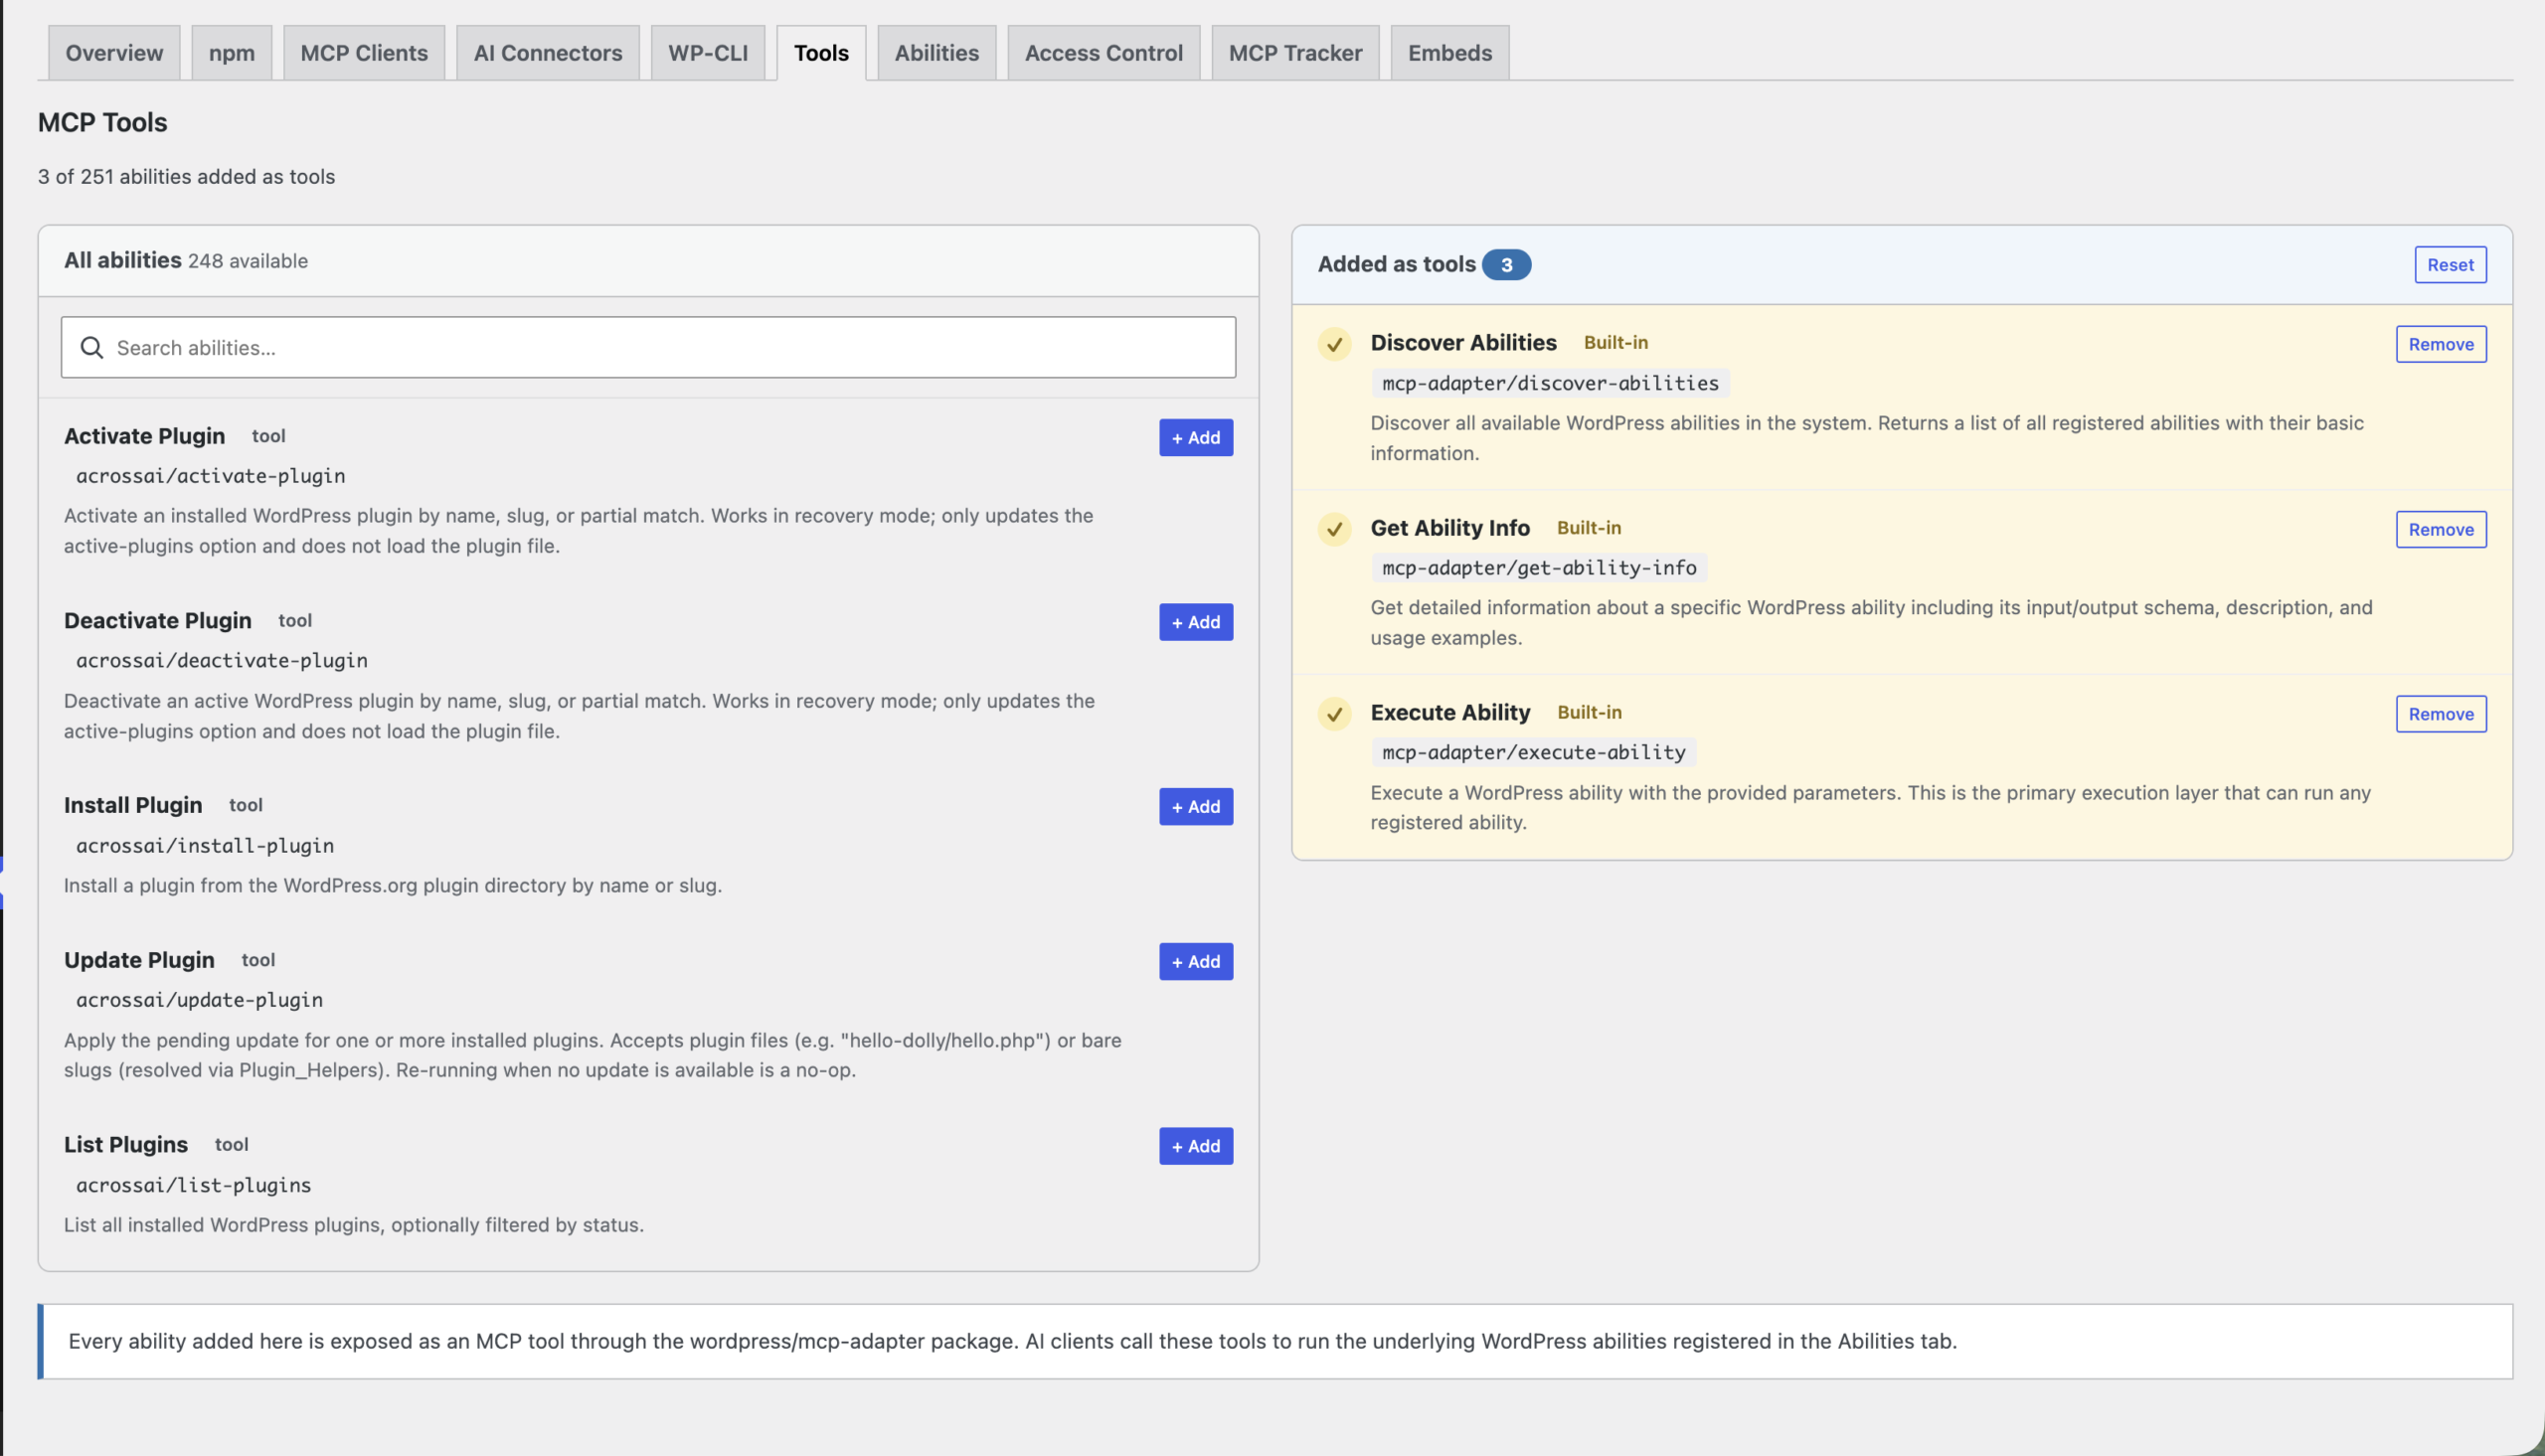
An MCP server only offers what you allow it to offer, and the Tools tab is the short list of what is actively exposed to clients right now.
The screen is a two-column picker. On the left is every available ability. On the right is what has been Added as tools for this server. Anything on the right is something an AI client can see and call.
- + Add moves an ability from left to right.
- Remove takes it back off.
- Reset clears the list and starts over.
Our advice: leave this tab alone to begin with. The defaults are sensible, and it is easier to get a connection working first and then decide what you want to expose. Come back once your client is talking to the site and you know which tools you actually reach for.
One thing worth knowing: only abilities that are exposed on the Abilities tab can be added here. If something you expect is missing from the left-hand column, that is why.
Full details: Choosing which tools and abilities to expose.
The Abilities tab
What an ability actually is
An ability is a single named thing your WordPress site can do — “create a post”, “update the site title”, “install a plugin”, “read a file”. Abilities were introduced as a core WordPress API so that functionality scattered across core, themes and plugins could live in one registry, described in a standard way, and be discovered by tools that were not written by whoever built them.
That registry is what makes MCP work. The Adapter does not know anything about your site specifically; it reads the abilities registry and translates whatever it finds there into MCP tools. No abilities, no tools.
What the tab does
The Abilities tab is the full catalogue of every ability registered on your site, and it controls which of them this particular server is allowed to see. It is the wider gate; the Tools tab is the narrower one inside it.
To enable abilities for this server:
- Open the Abilities tab.
- Use Search to find an ability by name, or filter by category, type or exposure status.
- Flip the Exposed toggle on any row to turn it on or off.
- To work in bulk, use Enable All / Disable All, or tick multiple rows and use Expose selected / Hide selected.
Exposure is enforced when a tool is called, not just when it is listed — a hidden ability is refused even if a client somehow asks for it directly.
As a rule of thumb: expose only what your AI actually needs, and widen the set as your use grows.

Get more abilities: the Abilities Manager plugin
A stock WordPress install registers relatively few abilities, which means a fresh MCP server has fairly little to offer. This is where the free AcrossAI Abilities Manager plugin comes in.
Abilities Manager adds a large catalogue of ready-made abilities — 300+ of them — covering the things people actually want an AI assistant to do on a WordPress site:
- Build custom landing pages
- General site maintenance
- Update the header and footer
- Update plugins, themes and WordPress core
- Add, edit and delete files
- Read
theme.jsonand write changes back to it - Manage users, media, menus, comments and taxonomies
- Inspect the database, cron jobs and site health
…and a good deal more.
Once Abilities Manager is installed, come back to the Abilities tab on your server and enable the abilities you want — or use Enable All if you want the full set available.
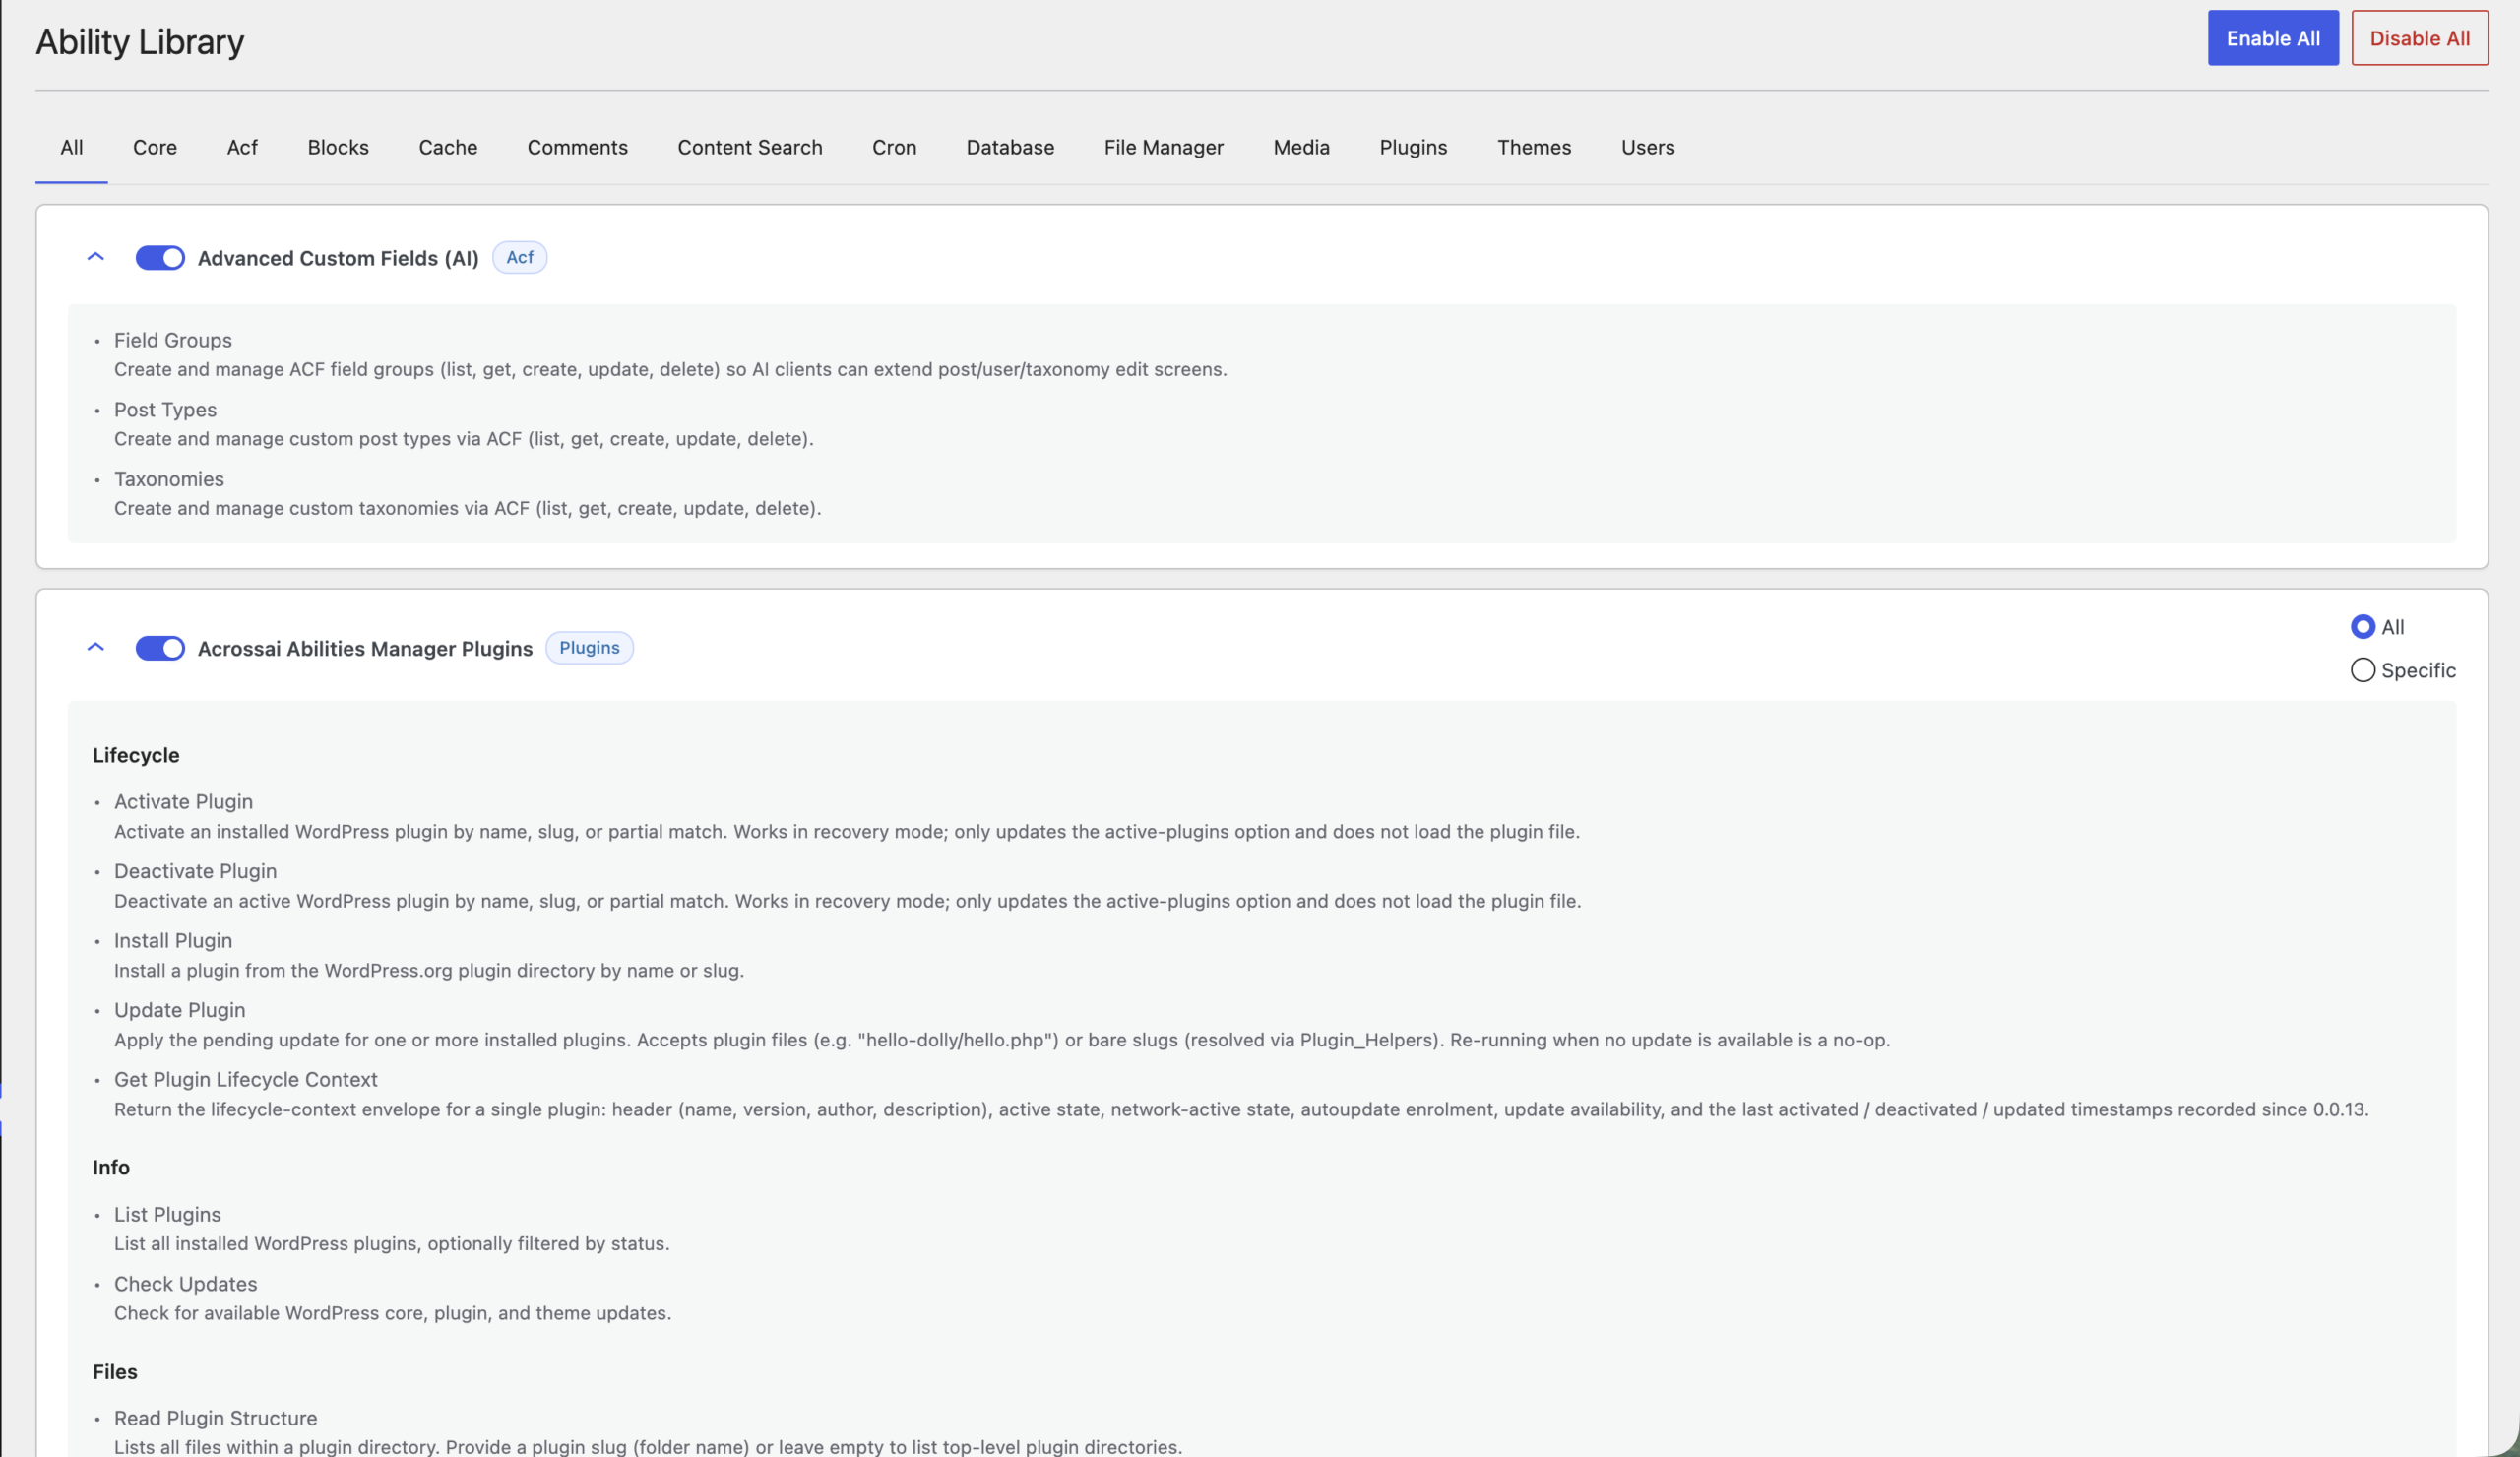
A note on safety
Every ability that ships with Abilities Manager is gated to administrators only by its own permission rules. That is deliberate, and it means enabling a lot of abilities does not hand them to your whole user base — a subscriber with a valid connection still cannot run them.
If you want finer control — a specific ability opened up to editors, say, or restricted to named users — you can set that per ability rather than all at once. See section 5. User Access in the Editing an ability guide, which walks through the Who can access control and its options.
Access Control
The last piece is deciding who may connect to this server at all. That lives on the Access Control tab.
Administrators always have access. Everyone else is governed by what you set here, and it is enforced on every request — a client with a perfectly valid password is still refused if its user is not allowed on the server.
Our recommendation: set Who can access → WordPress Role → Administrator, then click Save Access Control. On most sites there is no reason for anyone but an administrator to be driving an MCP server, and this is the single clearest way to say so.
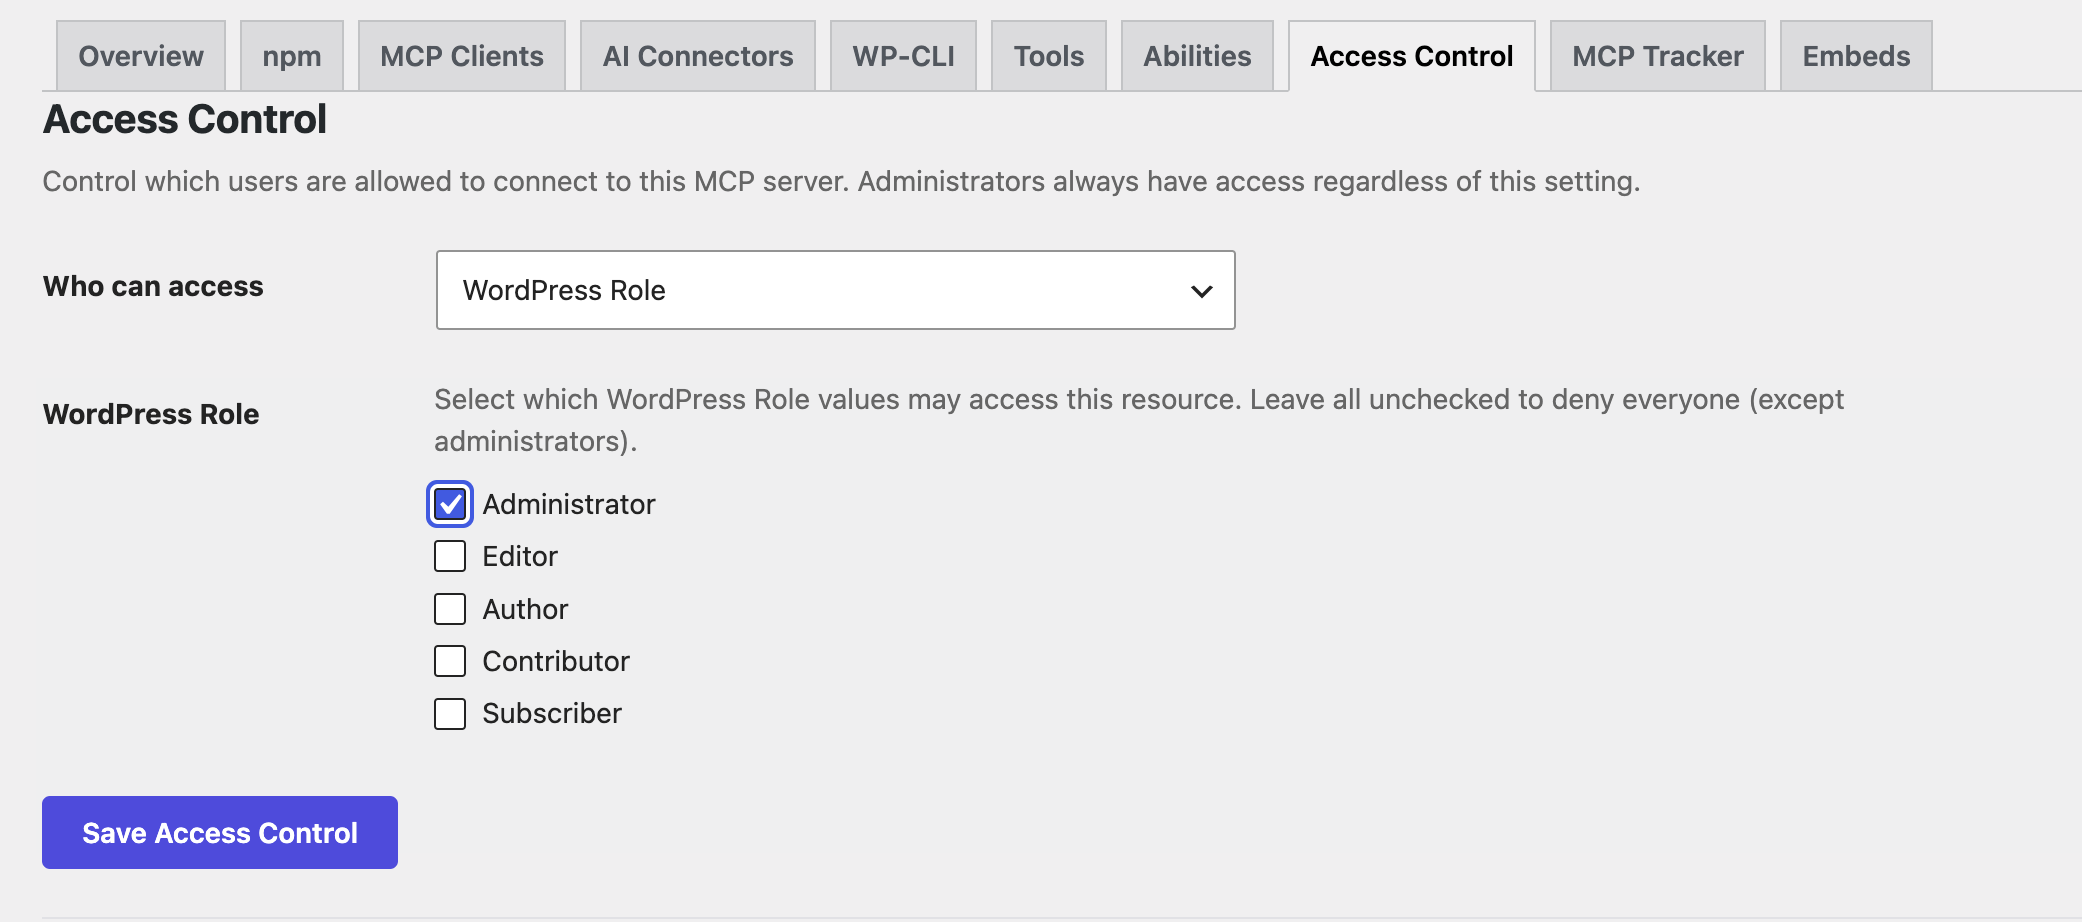
If you skip this step, you are not wide open — because every Abilities Manager ability is already restricted to administrators at the ability level, non-admin users still cannot run them. Think of it as two locks on the same door. Setting the server-level rule as well simply means unauthorised users are turned away at the door rather than at each individual ability.
The tab also has a per-server permission override toggle. When ticked, every ability exposed to this server is allowed for MCP requests routed to it, regardless of that ability’s own permission rule. It is a blunt instrument — useful in specific situations, but not something to enable casually. Site-wide callers such as wp-admin, other REST routes and WP-CLI are unaffected by it.
Full details: Access control and permissions.
Where that leaves you
The MCP Adapter made WordPress legible to AI assistants. What it did not do — because it was never meant to — was make that reachable by the people who own the sites.
MCP Manager is the interface layer that closes the gap. Install it, enable a server, pick a connection method, choose your abilities, set who is allowed in. All of it from the dashboard, none of it in code, and all of it reversible.
Weighing this up against the alternatives instead of setting it up? See MCP Adapter vs MCP Manager, which compares the two directly and looks at how both stack up against WPVibe and Novamira.