
The Abilities screen is the heart of the plugin. It lists every ability on your site in a familiar, spreadsheet-style table. Here’s how to find your way around.
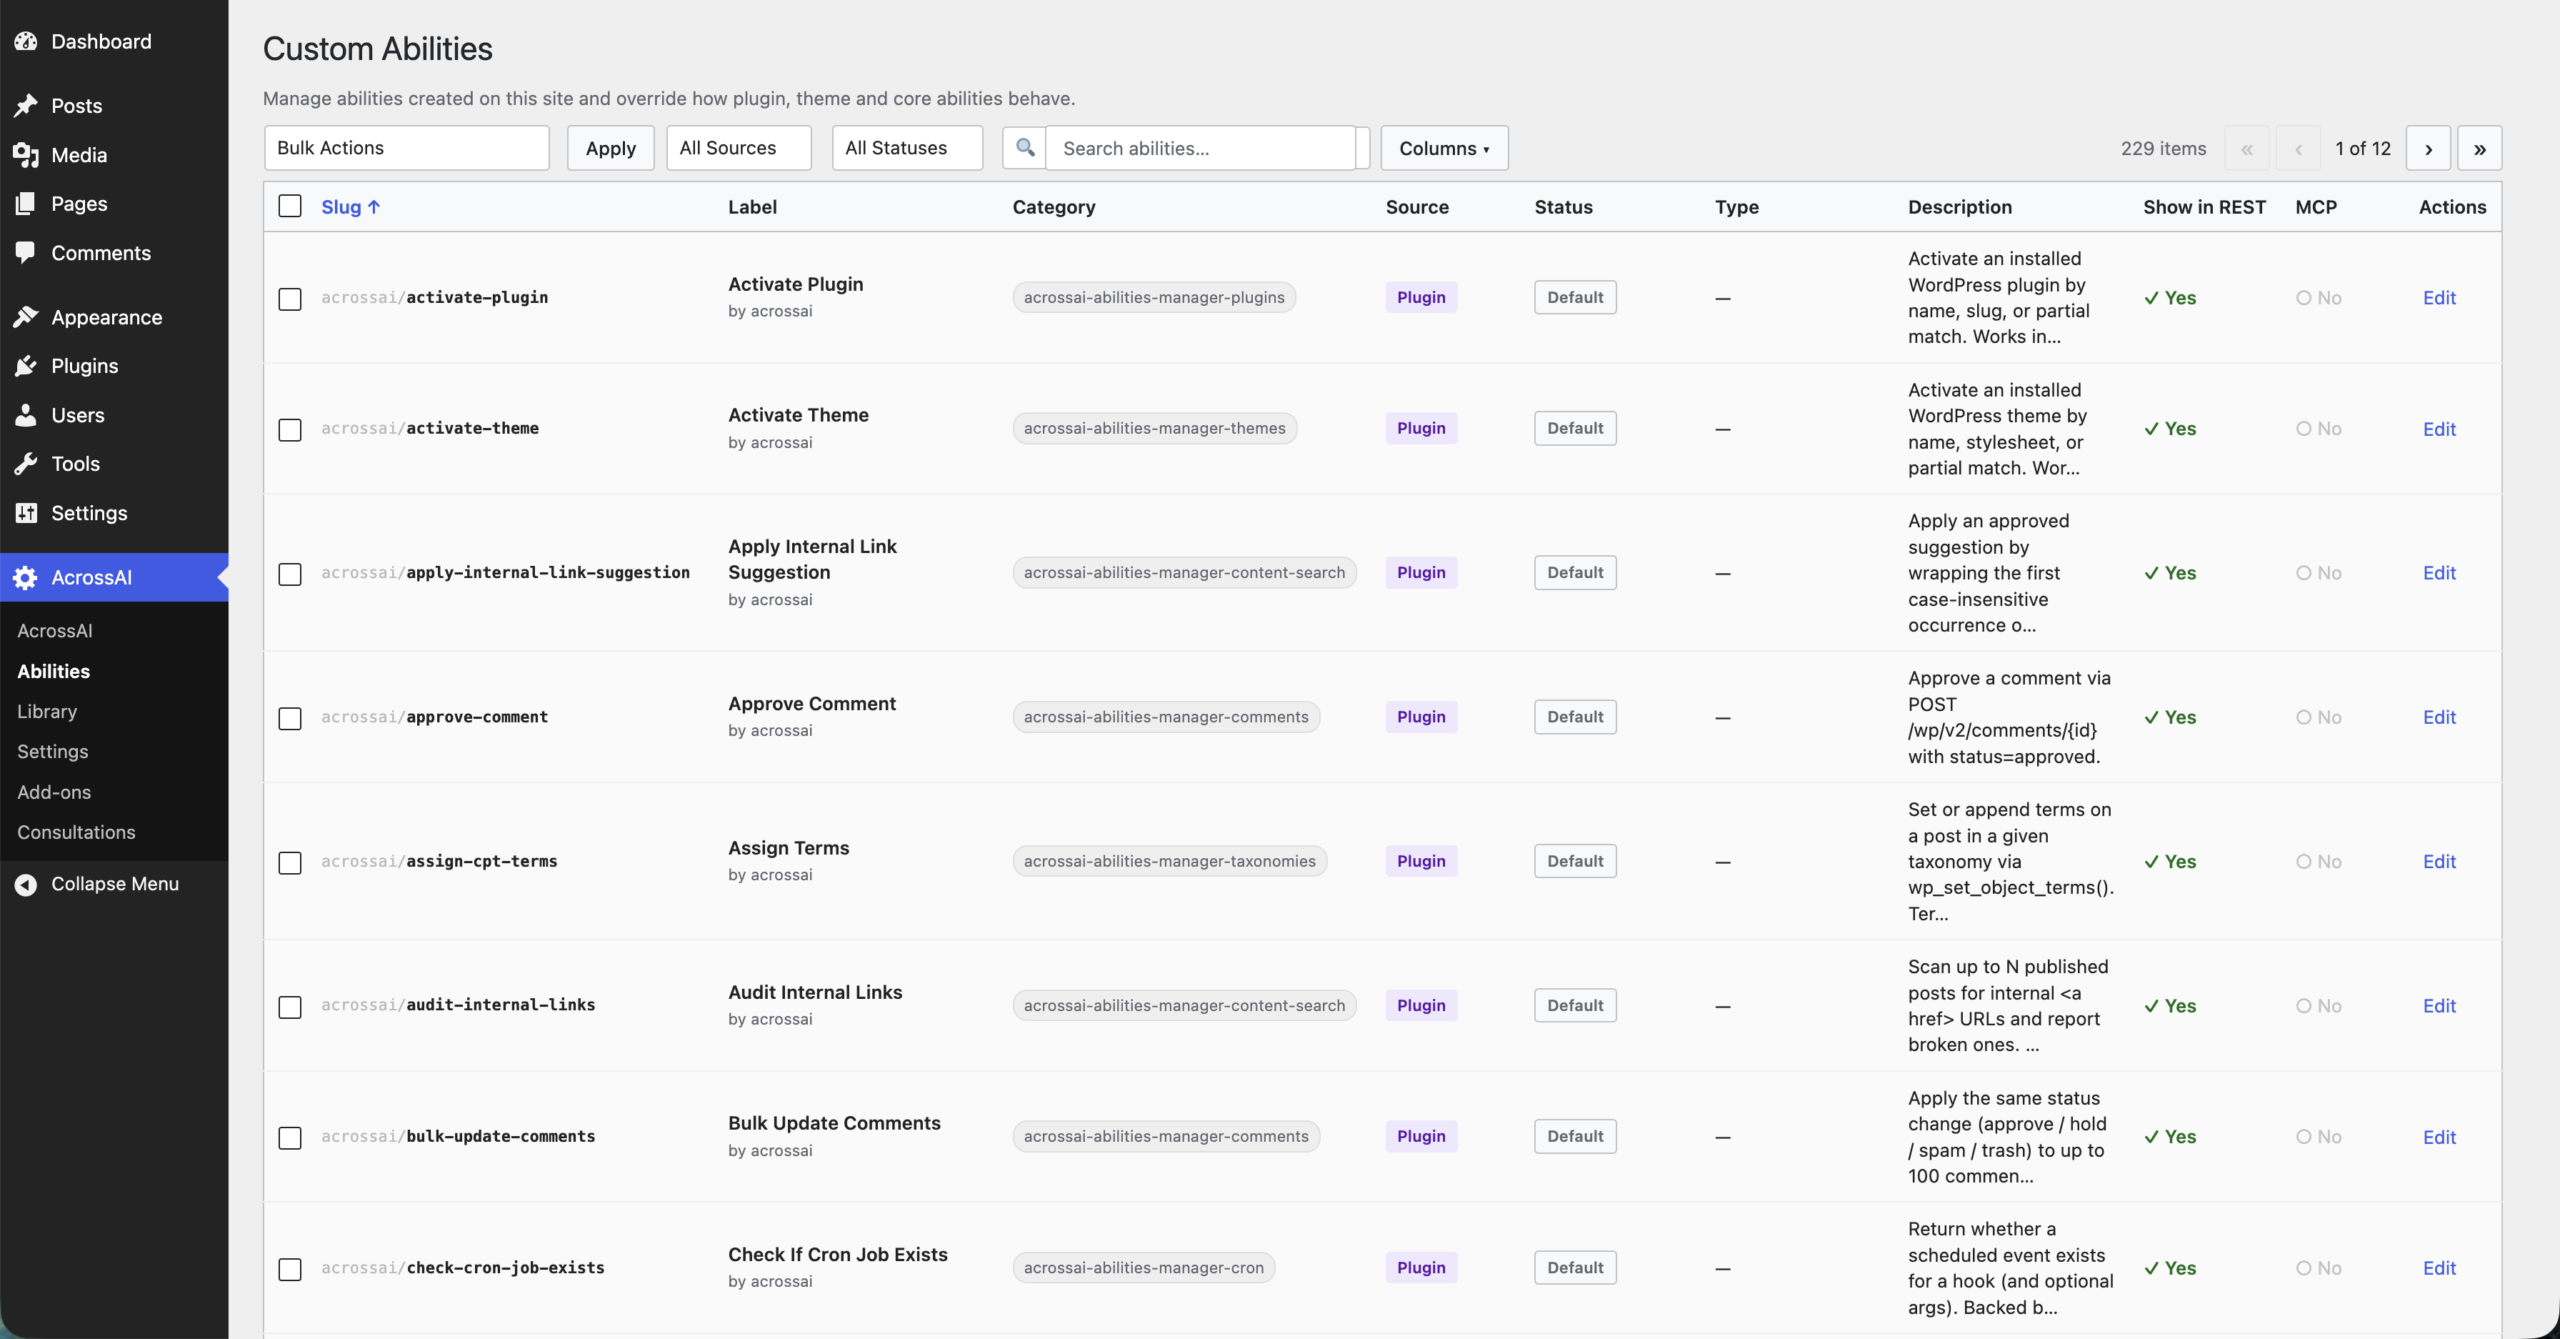
What each column means
- Slug — the ability’s unique technical name, e.g.
acrossai/create-post. - Label — a friendly name, plus who provided the ability.
- Category — the group the ability belongs to.
- Source — where it came from: a Plugin, a Theme, or WordPress Core.
- Status — whether it is running with its Default setting or a custom override you’ve made.
- Show in REST / MCP — whether the ability is exposed to apps and AI clients.
- Actions — the Edit link that opens an ability’s full settings.
Search
Use the Search abilities box to filter the list by name or description as you type.
Filter
The All Sources and All Statuses dropdowns let you narrow the table to, say, only plugin abilities, or only ones you’ve customised.
Sort
Click a column heading such as Slug to sort the table by that column. Click again to reverse the order.
Choose your columns
The Columns button lets you show or hide columns, so you only see the information you care about.
Move between pages
Large sites can have hundreds of abilities. Use the arrows at the top-right to page through them. By default 20 are shown per page — you can change this in Settings.